Our expert team can take care of it. Just click Get Expert Install and we'll send you an email when it's ready!
If everything looks okay to you, you can Ignore this warning.
It is possible that your ISP provider or email program has an automated spam filter activated. Here are some soultions to disable that feature for different types of email programs / ISP providers:
Many Internet Service Providers (ISP) such as AOL, Yahoo and MSN Hotmail have SPAM filters to give you greater control over what e-mails reach your inbox to help you avoid unwanted junk e-mail. Unfortunately, these filters can block e-mails you wish to receive from Breathing Color unless you add store@breathingcolor.com to your e-mail address book and/or update your e-mail program's white list or filters.
Below are instructions for the most common ISP or e-mail programs. (Different versions may have slight variations to the steps.)
AOL Subscribers:
1. From your mailbox screen click on the drop down arrow to the right of the 'Mail Options' and then click on 'Address Book'.
2. Click the 'Add' button ('Add Contact' for version 8.0).
3. Type in or cut and paste store@breathingcolor.com into the 'Screen Name' block and then click 'Save'.
Juno/Netzero Subscribers:
1. From your mailbox screen click on the 'Address Book' tab.
2. Next to the 'Lists' tab click the 'Add new contact' link.
3. Type in or cut and paste store@breathingcolor.com into the 'E-mail Address' block, and then click the 'Save' button.
Earthlink Webmail Subscribers:
1. From your mailbox screen click on the 'Address Book'.
2. Click the 'Add' button.
3. Type in or cut and paste store@breathingcolor.com into the 'E-mail' block and then click the 'Save' button.
Hotmail Subscribers:
1. Select the 'Options' links in the upper right of the screen.
2. Click on 'Contacts' link on the left part of the screen.
3. Click on 'Safe List'.
4. Type in or cut and paste store@breathingcolor.com into the box and then click 'Add'.
Yahoo Subscribers:
1. From your mailbox screen click on the drop down arrow to the right of the 'Addresses' and then click on 'Add Contact'.
2. Type in or cut and paste store@breathingcolor.com into the 'E-mail' box and then click 'Save'.
G-mail Subscribers:
From your mailbox, select 'Filters tab.
Select 'Create a Filter'.
Type in or cut and paste store@breathingcolor.com in the 'From' field.
Set 'Choose Action' to be 'Star it'.
Microsoft Outlook (most versions):
1. From your 'Inbox', select 'File' 'New' and then 'Contact'.
2. Create a contact in your address book for store@breathingcolor.com (Copy email address into the 'E-mail' field and click 'Save and Close' button.).
3. From your Inbox select 'Tools' then select 'Organize'.
4. In 'Ways to Organize Inbox', select 'Using Folders'.
5. Create a rule to move new messages store@breathingcolor.com to 'Inbox' and then click the 'Create' button.
6. Click the 'X' in the upper right section when done to close the dialogue box and return to Outlook.
We recommend letting 17M and Crystalline prints dry 1-2 hours before mounting or stretching for best results.
Any coated canvas—either glossy or satin—will be more susceptible to curling. This curling is most often caused imperfect atmospheric conditions. We have come up with the following quick start guide to help troubleshoot these issues: Crystalline Quick Start Guide
The best way is to profile Crystalline with a glossy paper setting, and use the Gloss enhancer on economy mode. This will cover the black ink, which is most susceptible to scuffing.
Lyve Canvas can be considered the "next generation" of our world-renowned Chromata White Canvas. In 2005 Chromata White was released as a groundbreaking matte canvas exhibiting unrivaled print quality, archival rating, and consistency, all of which still hold true today. Over the past several years the Breathing Color team of scientists have been diligently working to develop a new IRC (Inkjet Receptive Coating) that would represent the next evolutionary step forward in print quality and archival technologies of inkjet canvas.
While Chromata White Canvas is still considered a prominent industry-leader, Lyve Canvas exhibits a noticabley wider color gamut, greater DMax value, and sharper detail, making it a clear choice for the discerning printmaker. Lyve Canvas is the most recent example of our ongoing commitment to positively contribute the world of photography and fine art, through excellence in print quality and print permanence.
Many of our customers that use a smaller width printers have cut down the width of our rolls with using a band saw to cut the whole roll down to size. Also, some of customers prefer just to cut the roll into sheets, and then print. None of these methods will alter the integrity of the media.
Because inkjet canvas is a natural woven textile, it is susceptible to climate and environmental conditions. Cold conditions can cause the canvas to become more rigid, especially coupled with the low humidity levels many regions see during the winter months. However, cold storage shouldnt do any harm to the canvas as long as the rolls remain inside their original packaging and are allowed to acclimate to the printing environment for 24-48 hours before being used. Printmakers should use a first in, first out method to rotate the inventory in their print room
As inkjet canvas continues to gain popularity in the fine art and photographic digital printing industry, the multitude of available brands and varieties will persist and eventually flood the market in an attempt to take advantage of this increasingly desirable consumable. Current market research shows that inkjet canvas is selling three times more than inkjet paper, which historically, has never been the case. This swing in market trends suggests that art consumers are impressed by the aesthetic appeal and novelty of digitally printed inkjet canvas as it is a relatively new, yet logical medium for fine art reproduction. As an entrepreneur running a printmaking business, selecting an inkjet canvas that will be the foundation for your reputation and long-term success amid the array of possibilities, can be a daunting if not impossible undertaking. Nevertheless, it is the responsibility of the printmaker to understand and test inkjet canvas to source the highest quality to ensure sustainable-revenue and the integrity for their business. Therefore the purpose of this article is to provide printmakers with the proper tools to evaluate inkjet canvas based upon empirical data and measurable attributes; in an attempt to produce higher-quality, more-archival, and ultimately more sellable fine art inkjet canvas prints.
In order to properly evaluate inkjet canvas for your printmaking business, several criteria must be evaluated and considered. This criterion can be broken down into four primary categories: aesthetic appeal, longevity, production/business practicality, and brand association. Testing multiple brands and types of inkjet canvas is the best thing you can do for your business, your customers, and the fine art industry as a whole. That being said, the first thing you will need to do to get started is purchase sample material from several leading inkjet canvas manufacturers. Let this article be the guide or checklist to walk you though the important evaluation process.
Aesthetic Appeal
This category has been listed above all others because it is the single most important factor for evaluating your primary, house inkjet canvas. The fact is that this is the fine art industry and whether you are the artist, a gallery owner, a publisher, or a printmaker, the ultimate universal goal is to sell art. Art is predominantly sold as a result of its aesthetic appeal and the emotional derivative of the image presentation. In other words, the better your prints look, the more your artists will sell, which will naturally result in more printing business. If the artists that you print for are confident that you are reproducing their work in the most visually appealing manner and this is reflected in their print sales, you can be sure they will continue to employ your services. On the other hand, if the artist decides to shop around or happens to come in contact with an alternative printmaker who is obviously producing superior inkjet canvas prints, the artist will be gone in an instant. The only way to be certain that you are producing the most visually appealing inkjet canvas prints, is to test several different inkjet canvases for color gamut, Dmax (optical density), resolution, texture, and weight. Let us carefully consider each of these attributes individually.
Color Gamut In this increasingly competitive industry simply offering great color reproduction is not enough. You need to offer the best color reproduction. Although precise color gamut measurement tools, such as a Colorimeter or spectrophotometer can and should be used if available, the naked eye is usually enough to distinguish a superior inkjet canvas. Print a color target, which consists of several individual color patches, on each inkjet canvas that you are evaluating. Use these targets to compare each individual color to determine which inkjet canvas produces the best color gamut. It is also recommended to print the same, colorful image on each inkjet canvas and see which produces the most vibrant colors.
Dmax - Dmax is a measure of maximum density of an images color but more specifically its black density. Again, the most precise measurements can be taken with a densitometer, but the naked eye will suffice if this equipment is not available to you. When discussing paper and inks, Dmax is commonly defined as the blackest black possible. Black density is arguably the most discernable characteristic in evaluating the quality of ink, paper, inkjet canvas, and even printmakers themselves. Therefore achieving the blackest black possible should be the most critical concern for every fine art printmaker. In this increasingly competitive industry, as with color gamut, offering great blacks is simply not enough. You need to offer the blackest blacks possible.
Resolution - This refers to the smallest discernable dots or pixels, commonly measured as dpi or dots per inch. In relation to fine art reproduction, it is a measurement of the fineness of detail in a printed image. Resolution is a crucially important attribute because without fineness and detail, image quality is compromised. No matter how accurate your colors are or how dense your black may be if the image appears blurry up close instead of clean and crisp, you will have significantly decreased your chances of selling that print as it will negatively affect its overall perceived value. This will inhibit the artist from obtaining true market-value for his/her work, which will cause you the printmaker to lose business to a competitor who uses a inkjet canvas with superior resolution. It should be noted that inkjet canvases with excessive texture can also compromise resolution and should be avoided. The drastic peaks and valleys in the inkjet canvas texture can cause ink to bleed, or run, which will blur minute aspects of a printed image.
Texture The optimal texture of inkjet canvas is one that will exude a natural inkjet canvas look, without compromising resolution or reducing the amount of viewable angels in which the art can be appreciated. The latter is caused by any type of glossy finish on a highly textured inkjet canvas. The result is a sparkling affect caused by light reflecting off of the glossy peaks and valleys of the textured inkjet canvas. Sparkling inkjet canvas prints no longer take on the qualities of an original painting which causes art consumers to perceive them as cheap reproductions. In an industry driven by quality and aesthetic appeal, cheap reproductions won't sell and will be detrimental to a printmakers reputation.
All in all, even if a inkjet canvas is a clear leader in color gamut, dmax, and resolution, it may have excessive texture which alone can compromise quality. Therefore, printmakers should test for excessive texture. This can be accomplished in two ways. First, print images with extreme detail and look for a lack of image cleanliness and crispness up close. Second, use a semi-glossy or glossy post-print protective coating and look for sparkling when light reflects off the coated surface. It is important to keep in mind that texture is primarily a subjective attribute of which everyone will have a differing opinion. As a printmaker, it is wise to advise your clients to make a texture decision based upon objective information that will improve the sale-ability of their prints rather than attempt to source unique inkjet canvas textures to appeal to every artist's personal preference.
Thickness & Weight - These are completely subjective attributes that do not contribute to the visual appeal or the sale-ability of any inkjet canvas print. For their own reasons, usually related to their artist/customers, some printmakers have a tendency to place value on how a inkjet canvas feels. To the artist or printmaker (not the art consumer) perceived value can be associated with a heavier weight and thicker inkjet canvas. The fact is that it costs more to manufacture a inkjet canvas with a heavier weight and thickness, but neither weight nor thickness has any contribution to the visual appeal or longevity of a inkjet canvas print. The higher cost is simply not justified.
Once stretched, framed, and hanging on the wall in an art gallery nobody is touching or feeling the finished inkjet canvas print. These consumers have absolutely no way of determining the initial weight, thickness, or feel of the inkjet canvas. Therefore, these attributes are totally worthless unless of course they somehow affect your production process. For example, an excessively thin inkjet canvas might tear when stretching over frames. An excessively thick inkjet canvas might not feed through your printer. An excessively heavy inkjet canvas might senselessly raise your costs, lower your profit margins and in turn decrease your market competitiveness as a printmaker. Therefore, using a inkjet canvas because you like how it feels or how heavy it is, is just a disorganization of business priorities. Unless your customer requires a specific inkjet canvas weight or thickness, these two attributes should be considered your lowest priority. Generally it is a plus to have a heavier, thicker inkjet canvas but should not influence your inkjet canvas evaluation.
Longevity
Longevity refers to how long a inkjet canvas print will last before it begins to noticeably deteriorate. This is an absolutely critical element in determining which inkjet canvas to use for your business. In order to appropriately label yourself a fine art printmaker, you must produce fine art prints. By definition, fine art prints are expected to maintain their constitution for several decades. Fine art prints that deteriorate in the short-term maintain almost no value and were in fact, never fine art prints to begin with. Thus, longevity must be taken into consideration in every printmaker's long-term business strategy as selling deteriorating prints will no doubt contribute to the inevitable demise of your future business in the fine art industry.
Unfortunately, unbiased, objective longevity testing information about each inkjet canvas is not readily available. Therefore, the only real way to be confident that this longevity component is fulfilled is by choosing a reputable manufacturer with a worldwide recognized brand. These manufacturers have proven their ability to deliver and support fine art quality products to the masses. They also guarantee their products. Rest assured that if any problem does arise, most of them will be right there to fix the problem and/or reimburse you. A reputable printmaking business must have this guarantee where the manufacturer holds the risk. Printmakers should use these worldwide brands to their advantage by communicating their stability benefits to their own customer base. Nevertheless, it is important to understand exactly what characteristics affect the longevity of your inkjet canvas prints.
Acidity - One primary determinant of longevity is the acidic content within a inkjet canvas. The introduction of acid to a inkjet canvas print will cause it to quickly yellow and deteriorate. Finding a inkjet canvas that is completely acid-free and ph-neutral is extremely important in preserving the longevity of your prints. Most inkjet canvas suppliers will boast an acid-free product but in actuality they are referring only to the raw inkjet canvas material, conveniently leaving out the acidic content of the inkjet receptive coating applied on top, which completely negate the initial claim. In order to maximize and ensure longevity, printmakers should therefore make sure that a inkjet canvas has both an acid-free raw inkjet canvas base and an acid-free inkjet receptive coating.
Optical Brightener Additives (OBAs) - These are artificial brightening agents commonly used in many inkjet substrates to make them appear brighter or whiter than they actually are. According to the most recognized inkjet print permanence testing organization, the Wilhelm Research Institute, OBAs should be avoided because they compromise the longevity of fine art prints by causing yellowing, and by causing the colors of a print appear different under differing lighting conditions.
Color management guru David Coons of Artscans explains the difficulties in using OBA's:
Our main problems with OBAs are with reproducing original art with bright or pastel yellows. Since typical OBA coated media doesn't reflect warmer wavelengths as strongly as conventional natural white watercolor papers, it's often impossible to accurately reproduce many warm pastel colors such as light yellow.
Optical brighteners create an appearance of 'brightness' by inducing blue fluorescence in the presence of UV-rich light sources such as sunlight, metal halide, and fluorescent lamps. Papers coated with these brighteners tend to fight yellow inks in particular because of their bluish cast. Color management systems can help preserve relative color differences, but will never be able to overcome these physical limitations.
In June 2005 worldwide inkjet canvas manufacturer Breathing Color, Inc. out of Orange, California (www.breathingcolor.com) released the first ever optical-brightener free inkjet canvas and since, the product segment has grown in popularity at a very fast pace within the USA and is spreading to other regions of the world. Printmakers using this product are taking advantage of the credibility and competitive positioning it offers.
Water-Resistance - History has proven that inkjet canvases without sufficient water-resistance are fragile and increasingly susceptible to damage by humans and the environment (humidity). Although they can be protected and enhanced with solvent-based coatings, generally it is best to avoid them simply because they are more of a liability and increase longevity risk. Solvent-based coatings, which are mandatory with non-water-resistant inkjet canvases, also have a tendency to chip, crack, and flake over time and/or during the stretching process. Some manufacturers who have not yet been able to develop a truly water-resistant inkjet canvas have resorted to marketing semi-water-resistant inkjet canvases as water-resistant. Beware of these.
Although there is no documented industry standard for water-resistance, printmakers can easily test this on their own. Run a print and allow it 24 hours to dry. Once the ink has completely dried simply poor a glass of water over the print. If a inkjet canvas is not water-resistant, the ink will run and smear immediately. Some highly water-resistant inkjet canvases can withstand this test even immediately after printing. Printmakers using truly water-resistant inkjet canvases also enjoy the added benefit of the ability to use a water-based post-print coating, which in most cases is much more durable than the solvent-based alternatives.
Post-Print Protective Coatings - Commonly sold in gloss, semi-gloss, and matte options, these post-print protective coatings are most commonly used to preserve and protect inkjet canvas prints from abrasion and harmful ultraviolet light. They are also used to enhance color and increase the visual appeal of a inkjet canvas print.
Printmakers should evaluate a coating for the following: First, it must sufficiently protect a inkjet canvas print from abrasion. This means that if anyone were to accidentally touch, scuff, hit, or spill anything onto the printed surface nothing will happen. The integrity and value of the print is essentially preserved. Second, a giclee coating must protect a inkjet canvas from harmful ultraviolet light. Although it should always be avoided, this means that the inkjet canvas should not fade or yellow if it were to be in direct or indirect sunlight for extended periods of time. Third, a coating should be able to enhance color in order to increase the visual appeal of the inkjet canvas print. Fourth, a coating should not provide any sort of yellow cast over the image. This is a negative side effect that compromises the integrity and value of a inkjet canvas print. This yellow casting issue can be tested by simply comparing a coated and uncoated piece of unprinted inkjet canvas. If the coated portion appears yellow, then this coating is working against the quality of your reproductions and should be substituted with a more reputable product from a fine art manufacturer. Finally, the coating should not crack when stretching over frames. If the giclee coating cracks you are unnecessarily decreasing the quality of your inkjet canvas reproduction. All reputable inkjet canvas manufacturers have information on coatings that is compatible with their products. Selling prints that crack when stretched is unacceptable in this industry where public information about coating compatibility is readily available for all printmakers.
Only use fine art giclee coatings from reputable manufacturers that produce products specifically for the fine art market -- not to be confused with coatings made to protect signage or other surfaces and are erroneously marketed by many suppliers as fine art coating substitutes. Beware of these untested products with no history or track record.
Production
Now that we have discussed the most critical aspects of selecting an inkjet canvas in aesthetic appeal and longevity, let's shift our focus production, more specifically, how does this inkjet canvas work with your operational flow? Production can and should be shaped around a high-quality, archival inkjet canvas, rather than finding a inkjet canvas that works with your current production flow. I say this because many printmakers are forced to make this decision when they encounter a problem with a inkjet canvas or supplier. Do I select a new inkjet canvas that works well with my current system and flow or do I select the best inkjet canvas I can find and adjust my production flow around it? Though the latter may be more difficult in the beginning, this decision will no doubt pay off in the long term. Nevertheless, there are some inkjet canvas characteristics that are more suitable for every printmaker's production flow and should be sought after. Consistency - Roll to roll consistency is a vitally important issue for every printmaker, especially for high production environments. A lack of consistency can cost your business a lot of time and money in defective prints and material waste. It can even cost you customers.
Any inkjet canvas manufacturer can tell you that inkjet canvas manufacturing is by far the most difficult inkjet product to consistently produce. No inkjet canvas is perfect, and at some point in time every printmaker will receive faulty inkjet canvas that they must return. For the most part, some inkjet canvases tend to be more consistent than others and these are the ones you need to find. If you choose a inkjet canvas that is very consistent your business and customers will enjoy smooth production without hassles. This is where the actual make-up of a inkjet canvas becomes relevant.
The two most common fine art inkjet canvas options are 100% cotton inkjet canvases and poly/cotton blend inkjet canvases. 100% cotton inkjet canvases used to be the first choice amongst the majority of fine art printmakers because of its perceived higher quality and natural look and feel. These days, after years of manufacturing inconsistencies, 100% cotton inkjet canvas is avoided by the majority of the market and hardly any manufacturers produce them anymore. The inconsistencies include shrinking (when coated or when subject to a high humidity environment), expanding (long after being stretched and framed, causing the print to sag and appear off balance on one side), and the presence of visible, black cotton seeds. These black cotton seeds end up in the middle of prints and can make them look dirty or defective. They also have a tendency to fall off, leaving white voids in your print. Collectively, it is for all these reasons that 100% cotton inkjet canvases are not widely used by fine art printmakers any longer.
Instead, consistent and high quality polyester-cotton blend inkjet canvases (or polycotton inkjet canvases) have become by far the most widely used inkjet canvas base in the fine art industry. Poly/cotton inkjet canvases are of not inferior in print or longevity quality, but do lack the natural look or feel of the 100% cotton inkjet canvases. However, polycotton inkjet canvases are typically free of cotton seeds and do not shrink or sag after long periods of time. Ultimately, the crucial importance of roll-to-roll consistency has fueled the demand for polycotton inkjet canvases over the years. Until consistent 100% cotton inkjet canvases are introduced, these poly/cottons will continue to drive the market.
It is important to understand that roll-to-roll consistency of polycotton inkjet canvases also vary from manufacturer to manufacturer. Roll-to-roll consistency really comes down to a given manufacturer's quality control. Larger companies always have better quality control because of how costly this process is. There are always defects in inkjet canvas productions and the primary role of quality control is to isolate the defects so that they do not reach the marketplace. Some manufacturers do this better than others. As a general rule, it is better to stick with a larger manufacturer, provided of course that they have the best product with regard to aesthetic appeal and longevity.
Stretch-Ability - As stated earlier, a finished, coated inkjet canvas print that cracks or tears when stretching over frames significantly loses value and also appears cheap in the eyes of consumers. To avoid this, printmakers can test a inkjet canvas by coating piece of it, allowing it 24 hours to dry, folding it backwards, completely in half, and then firmly pressing the fold to make a crease. If the inkjet canvas does not crack in the creased area, it will most likely not crack or tear when stretched. Nonetheless, the only way to be sure is by sending a print to your framer (unless you frame yourself) who can provide reliable feedback.
Cost - This is the final determinant of a printmakers market competitiveness. Specifically, what level of quality does he/she deliver relative to the asking price. In order to be the most competitive, a printmaker must use the highest quality product available at the lowest price, but not if price compromises quality. In this industry, price does not always determine quality. This is because the distribution methods of manufacturers are the primary determinant of the end user price. Most manufacturers use regional distributors who in turn mark up the cost of the product and sell it to end users. This is the traditional distribution method of this industry. Contrastingly, a few select worldwide manufacturers sell direct to the market, eliminate the regional distributor, and are therefore able to offer fiercely competitive pricing directly to the end-users. By researching manufacturers and their pricing structures, printmakers can gain a good understanding of what each has to offer. The goal is to maximize quality and minimize cost.
It is also important to consider buying inkjet canvas or other substrates in bulk. Many manufacturers and distributors will offer volume discounts on inkjet canvas. Therefore, businesses can drastically lower their overhead, simply by buying in bulk and stocking their best selling products. Buying in bulk will also lower overall shipping costs by ordering once every 3 months for example as opposed to once per week. Bulk-buying will also ensure that you have sufficient inventory to promptly begin and deliver urgent print jobs.
Brand Association
As if it hasn't already been stressed enough, printmakers need to know as much as possible about the manufacturer before they start printing on their inkjet canvas. First, printmakers need to distinguish between a true manufacturer and a private-labeler.
Private-labelers are companies who conceal the original manufacturer by applying their own names to a product. Due to the exponential growth of this industry there is an overwhelming abundance of private-labelers. Every single regional inkjet supplier who brands their own inkjet canvas is private labeling. If they tell you otherwise, they are not being honest with you. It costs millions upon millions of dollars, not to mention rare expertise, to produce and support even one high quality fine art inkjet canvas, which is why very few manufacturers really exist.
Many re-branded inkjet canvases on the market over the past few years have been produced at a very low cost from unreliable inkjet canvas mills in countries where labor costs are low (i.e. China). The problem with these manufacturers is that they lack the financial wherewithal to support a fine art inkjet canvas and will turn their back on the first sign of a problem. They have no brand, they are not interested in building a brand and they have nothing to lose. A manufacturer without extreme care of a brand in the delicate fine art industry is a very bad sign and should be avoided at all costs.
The less-informed, poor inkjet canvas choices made by regional inkjet suppliers and their printmaking customers have plagued the local markets at times. A recent issue involved a particular inkjet canvas that was being marketed and sold within Australia as a fine art inkjet canvas of the highest quality. To the dismay of its users, this inkjet canvas began to turn yellow on the walls of its buyers only eight months after it was printed and even coated. This resulted in massive returns, lawsuits, bankruptcies, and ruined the credibility of many of the businesses involved. Normally a bad inkjet canvas choice will simply result in a loss of competitive positioning, but the point of this example is to stress how bad it can get.
The only way to be certain is to choose a inkjet canvas that comes from a widely recognized worldwide brand with a public reputation. You can confirm this by visiting the manufacturer's web site and reading about their company. Read about their products, their values, and their mission. Read their press releases and see if and how long they have been covered by the media. If posted, read their customer testimonials and do further research on the reputation and history of these customers. Then, contact the company directly and speak to a representative who should be interested in starting a relationship with you. Make a small purchase of a sample kit or anything else that will allow you to evaluate how the Company delivers. Take note of the marketing materials they provide, the look of their packaging, etc. Gather some influential industry publications and look at the company's advertisements. There are far less than ten worldwide inkjet canvas manufacturers and through this research they will be easily distinguishable.
Reputable printmakers simply do not even waste their time even trying inkjet canvases that do not come from long-standing worldwide brands who have been in the industry for years. By conducting some research one can conclude that the more reputable the printmaker, the more likely it is that they strictly use long-standing worldwide brands. Chances are, they have learned the hard way at some point in time.
Conclusion
In this rapidly expanding industry, printmakers lose or capture business daily as a direct result of customers demanding individual inkjet canvas attributes. The higher volume the customer is, the more sophisticated and knowledgeable they will be, and the more significance each inkjet canvas attribute will have to them. Higher volume customers learn faster and earlier than the rest of the market, but eventually, the rest of the market catches up. Therefore, the only long-term strategy is to master knowledge of these attributes and offer the best inkjet canvas that the industry has to offer. The best inkjet canvas, in and of itself, will always be a subjective analysis but by prioritizing these attributes one can interject a certain level of objectivity into it that customers will understand and trust.
Teddy Blah of MFA Talon Graphics (www.mfatalon.com) of El Segundo, CA says MFA Talon Graphics has been a one of the largest worldwide fine art printmakers for nearly 20 years now, and to uphold our leading reputation, our substrate decision making process from inkjet canvases to papers is extremely intricate and involves many people. The ultimate decision comes from an accumulation of years and years of learning experiences, coupled with constant tests and evaluations of new products, to discover what will continue our reputation and propel MFA Talon Graphics to increasing levels of quality. We know where to find the best materials, we know how to test and evaluate them, and we only use what is logically determined by us to be the absolute best that we can offer our customers. It is a never ending process and by treating it this way we improve our quality every single day.
Finding the best inkjet canvas for your business will result from an accumulation of inkjet canvas knowledge as brought forth by this article along with your continual research and pursuit of maximum quality. We hope that printmakers all over the world save this article and use the information presented within it, to better their businesses and to better the fine art printmaking industry as a whole.
Optical Brightener Additives (commonly referred to as OBA's) are widely used in paper coatings, textiles, and laundry detergents to increase the perceived "whiteness" of the treated products. OBA's work by absorbing light from the (invisible) ultra-violet end of the spectrum and emitting light in the (visible) blue/white range of the spectrum. This shift in the frequency of light energy, results in a whiter and brighter appearance of the treated product.
Many digital inkjet printmakers, who print using Epson 9800, Epson 7800, Epson 4800, and/or Canon imagePROGRAF iPF9000 prefer a bright white surface to print on, to the true surface color of their naturally-yellow substrate. As a result, paper manufacturers are adding OBAs to the digital inkjet receptive coating (IRC) used on their fine art papers and inkjet canvas'. The reflection of white light emanating from the OBAs will completely overwhelm the paper's natural color, creating a higher perceived whiteness, which artificially enhances the maximum color gamut and black density of the printed image. Popular rag papers that contain OBAs are the Hahnemuhle Photo Rag, Somerset Velvet, and Breathing Color Elegance. These papers are known for their bright white surface and excellent color gamut and black density.
While OBA's appear to be an effective solution for enhancing the whiteness and overall image quality of inkjet paper, this conclusion is slightly premature. The fact is, that OBA's can pose a serious threat to the integrity and longevity of a fine art print by accelerating metamerism and causing color shifts, and yellowing over time. Let us explore each of these issues in further detail.
What is metamerism? Harald Johnson defines metamerism as a normal phenomenon relating to how the human eye perceives color. It occurs when "two different color objects have the same color appearance to a normal human viewer under one light source (metameric match) but look different under another light source (metameric mismatch)." (*1) To a printmaker, this means that the painstakingly precise color information applied to each print will be compromised whenever that print is viewed under a different light source. Thus, one primary goal of any printmaker should be to avoid metamerism in order to validate the time spent on color management and to uphold the integrity of the reproduction. After all, what good is a reproduction if it does not closely match the original?
Now that we understand metamerism and why it should be avoided, how do OBAs fit into the picture? When OBAs are exposed to UV light, the treated paper appears brighter and whiter. When OBAs are not exposed to UV light (in the evening), the OBA's "lose activity", causing your eye to actually see the paper color without OBAs - which will look creamy or somewhat yellowed. This amount of "OBA activity loss" will vary constantly depending upon how much exposure the paper has to UV light. Picture the lighting conditions inside of an art gallery and how they will change depending upon the time of day. This will have a subsequent effect on the art itself, as it is exposed to various levels of UV light throughout the day. For example, your print could be displayed in a gallery near a window where direct or indirect daylight may be illuminating the print. In a case like this, where there is a high UV component, inkjet papers that contain OBA's will strongly fluoresce and will appear bright white. However, in the evening when the same print is displayed with low or non-existent UV component (or incandescent tungsten illumination), the OBAs will not fluoresce, making the paper appear yellow, therefore causing your eyes to see the image color differently.
How does this happen? Think about it. Your "bright white" paper is profiled to your printer so that the computer can translate color information accurately to the substrate. Anyone with experience creating color profiles will tell you that the "white point" of your substrate is an integral component of a profile's accuracy. If the whiteness of your paper changes, so must your profile. This is precisely how OBAs are constantly working against your color management. As the perception of whiteness of the paper is constantly changing, so do the perception of colors. Here's a good test. If you can find a paper offered in both bright-white and natural-white, try using the natural-white paper printing profile on the bright-white paper. You will be surprised by how different your results will be.
Next, take both papers and observe the whiteness in broad daylight. The paper with optical brighteners should look extremely bright white, while the paper without optical brighteners will look creamy. Then, take the two papers indoors where they are exposed to no sunlight and observe the whiteness. You probably will not be able to tell a difference between the two. At the very least, you will notice that the paper with OBAs no longer looks so white and bright. Many times, the OBA-Free paper will appear whiter. Nevertheless, the important point is that your OBA-Free paper has remained consistent under both lighting conditions, while the paper with OBAs has been inconsistent. This inconsistency directly correlates to the inconsistency that your image color will have under different lighting conditions. Still, overall white point is only one of the risks associated with using substrates that contain OBAs.
Another problem with OBAs is that they have been known to decompose over time and can cause yellow stains to appear on your prints. It is possible to avoid this issue with UV inhibiting products and overcoats that are designed to reduce the UV activation of OBAs, but their effectiveness in this regard has yet to be proven. Therefore, regardless of the post-print protective coating that can be applied, the fact remains that any fine art print made on a paper manufactured with OBAs is a print at risk. To quote Henry Wilhelm from the Wilhelm Research Institute, "When long-term image permanence is an important consideration - or may eventually become an important consideration - fluorescent brighteners should be avoided".
This associated risk is precisely why OBA-Free papers have rapidly gained popularity in recent years despite their "Natural White" color, which could be considered creamy or even yellow. Of course some printmakers have chosen to use OBA-Free papers because they specifically like the warm tone of the paper, but the majority of the market is avoiding papers manufactured with OBAs because they (1) enhance metamerism and (2) they are a potential risk to the longevity and integrity of a substrate. A few examples of popular OBA-free papers are Epson's Ultrasmooth Fine Art Paper, and Breathing Color's Sterling Rag 210.
Printmakers who use OBA-Free papers simply eliminate the entire element of what can be called "OBA-associated Risk" from their business. These printmakers know that metamerism is a problem that should be minimized whenever possible - certainly never enhanced. Furthermore, OBA's have degradation potential and up to this point there is no guarantee that anything will last. Nevertheless, if an artist or photographer specifically requests that their artwork be printed on a paper manufactured with OBA's, a disclaimer should be issued, clearly explaining the facts and associated risks. Ultimately the customer should be left with the decision of how they want their art to look.
In an industry so obsessively tied to color accuracy and long-term print stability, it is a wonder why OBA-Free papers are not more commonly used than papers manufactured with OBA's. Art sells because of how it looks and in this business there is no room for error. Therefore, anyone who is involved in this relatively infant industry of selling printed art has genuine incentive to make color integrity a top priority. As further research is performed on the subject of OBA's, this industry will become more educated which will most likely cause a shift towards the widespread use of OBA-Free papers.
It is for this reason that Breathing Color has been conducting a great deal of research and development in quality paper manufacturing, which has resulted in the latest technological breakthrough "Chromata White". The Chromata White technology allows Breathing Color to create a highly stable white base paper/canvas without the use of harmful OBA's or any other fluorescent brightening additives. Color shifting is reduced by stabilizing the whiteness of the base substrate with a special anti-oxidation technology that even further protects printed images. Furthermore, metamerism is minimized by quenching the ultraviolet excitation wavelengths resulting in a more stable illumination of an image under different spectral power distributions.
By using Chromata White inkjet papers and canvas', printmakers now have the opportunity to get the best of both worlds. They eliminate all OBA-associated risk, and they have bright white surfaces to make beautiful prints that uphold the highest standards of color integrity that are possible today.
The best way to protect coated prints when stacking or sending out to ship would be to wrap the print in Glassine paper. You do not want to separate your prints with paper that contains acid in it. If acid comes into contact with your print it may cause the print to turn yellow. You can find many different types of Glassine papers online, or at your nearest art supply store. The main thing to keep in mind when looking for this type of paper is to make sure the paper has a neutral pH level, or acid free.
When printing on canvas or fine art paper, it is critical that the prints be allowed to dry and outgass fully before they are mounted, stretched, and/or framed. Typically this takes 24 hours. Finishing these prints prematurely can cause a whole host of problems from splotchy glass when framing, to pin holes and bubbles while coating in preparation for stretching. Read more about dry time and outgassing on our blog.
Length-wise (or vertical) canvas shrinkage is typically caused by tension created on the printer while printing with canvas rolls. This shrinkage is normally quite consistent and can be compensated for through Photoshop. Read more about how to compensate for canvas shrinkage here on our blog, The Art of Printmaking.
To prevent the transfer of oils and dirt from your hands to the inkjet receptive coating of the media, white cotton gloves should be worn when handling the media. When not using the media, you should store it in its original packaging, exactly how it was shipped to you. Read more about our recommended handling and storage best practices on our blog, The Art of Printmaking.
When printing on canvas or fine art paper, it is critical that the prints be allowed to dry and outlgass fully before they are mounted, stretched, and/or framed. Typically this takes 24 hours. Finishing these prints prematurely can cause a whole host of problems from splotchy glass when framing, to pin holes and bubbles while coating in preparation for stretching. Read more about dry time and outgassing on our blog.
Cleaning fine art prints that are coated with our Timeless or Glamour 2 varnish is quite easy. Simply use a damp cloth to gently wipe the surface of the coated print to remove dust or dirt. Read more about cleaning your coated fine art prints here on our blog, The Art of Printmaking.
Edge curl is something that most users have learned to deal with, but there are ways to remove it. We have found an easy and affordable method for flattening your prints. The best part is you can use supplies you already have in your print shop! Here are the supplies youll need:
Read more about how to remove this type edge curl here on our blog, The Art of Printmaking.
There are a few different things that can cause banding. Most commonly, you will see banding occur when there is a clogged nozzle or something else hardware related. Please follow the steps below to help identify the issue:
Many of our customers that use a smaller width printers have cut down the width of our rolls with using a band saw to cut the whole roll down to size. Also, some of customers prefer just to cut the roll into sheets, and then print. None of these methods will alter the integrity of the media.
We have the Pura Bagasse, Smooth and Pura Bagasse, Textured double sided fine art paper.
If you are selling fine art gicle prints your quality driven customers will demand using an acid-free pH-neutral archival inkjet fine art paper. Museums and fine artists with rigid standards will require this class of fine art paper. So if you are looking for a wide format media you can trust, Breathing Color fine art papers have become the most popular solution for fine art printmakers and publishers worldwide. For example, Breathing Color's Elegance Velvet Fine Art Paper, Elegance Textured Fine Art Paper, and Sterling 280g Smooth Fine Art Paper, are available in both sheets and rolls.
There are several good reasons to use the fine art papers available from Breathing Color. First and foremost, your business requires nothing less than the best quality paper available so that your customers are guaranteed to maximize potential color gamut and dmax. Second, by buying direct from a fine art paper manufacturer, you can eliminate middleman distributors and save money in the process.
Cheap papers are suitable for normal printing for pictures to share with friends and family, and also have their use for proofing pictures you intend to print for sale or display on more expensive materials.
Choosing a Surface of a Fine Art Inkjet Paper
You may not like the particular inkjet fine art paper surfaces that you have tried thus far, which could have been the papers you received with your Epson printer. Although the range provided by, for example Epson, is large enough to be confusing, the fine art papers included in it actually only cover a fairly small range of what is available. Using fine art papers from a "third party manufacturer" gives you a much wider choice, including many different smooth and textured inkjet papers and shinier gloss finishes as well as some unusual materials including some non-paper surfaces including fabric such as an inkjet printable silk as well as signage and inkjet banner products such as adhesive vinyl. All of these fine art inkjet papers are available at much more competitive prices and are, in many cases, superior in performance.
Choosing a Weight of a Fine Art Inkjet Paper
The traditional measurement of fine art paper thickness is given in grams per square meter (gsm). Normal typing paper is around 80 gsm, and typical inkjet fine art papers may range from 120-310 gsm. More expensive fine-art papers are usually on or over 300gsm, while the lesser expensive ones are on or below 210gsm. Heavier fine art papers can cause problems with the paper feed in some printers. Small-format models that have a significantly curved path for the paper through the machine are particularly unlikely to be able to use such heavyweight papers. However, despite what the printer manual says, usually double the maximum weight specified with some printers will print fine art without problems.
Archival Qualities of Inkjet Fine Art Paper
Three factors - paper, ink and paper coating - interact to determine print lifetimes, as well as the environmental factors including storage and display conditions. Good fine art papers are likely to lead to longer lifetimes, and as with most other media, this generally means acid-free materials.
Cheaper fine art paper generally will not last well, breaking down over time to give acidic materials that will attack the image. Acid-free papers usually perform better.
The best fine art papers are generally made from 100% cotton rag rather than wood pulp, and these tend to be expensive - at least a dollar for a sheet.
Inkjet Fine Art Paper Confusing Issues
There are actually relatively few manufacturers of high quality papers. The distributors sell many papers made by some manufacturers under different brand names, which makes for some confusion. Claims by some of these re-branders that they specify different coatings for the paper they sell often - if not always - appear to be untrue. The aim of this re-branding is to lock the user into using paper supplied by them, when the same material (but under a different name) may be available more cheaply elsewhere. Breathing Color does not participate in such a strategy and our customers appreciate the exlcusivity and uniqueness of our product line.
Glossy Inkjet Fine Art Papers
Gloss papers are generally made for non-archival use. They range from highly reflective plastic films to materials with a relatively low gloss, that are almost closer to a pearl or lustre finish.
Pigment printers seldom produce good results on gloss surfaces, often giving very slow drying and patchy results.
First make sure your Platen Gap is set to WIDER. If that doesn't help, you'll want to turn up the Paper Suction which is found in your driver under "Paper Configuration." Turning up the suction will hold the paper firmly to the bottom of the printer and stop rubbing.
Optical Brightener Additives (commonly referred to as OBA's) are widely used in paper coatings, textiles, and laundry detergents to increase the perceived "whiteness" of the treated products. OBA's work by absorbing light from the (invisible) ultra-violet end of the spectrum and emitting light in the (visible) blue/white range of the spectrum. This shift in the frequency of light energy, results in a whiter and brighter appearance of the treated product.
Many digital inkjet printmakers, who print using Epson 9800, Epson 7800, Epson 4800, and/or Canon imagePROGRAF iPF9000 prefer a bright white surface to print on, to the true surface color of their naturally-yellow substrate. As a result, paper manufacturers are adding OBAs to the digital inkjet receptive coating (IRC) used on their fine art papers and inkjet canvas'. The reflection of white light emanating from the OBAs will completely overwhelm the paper's natural color, creating a higher perceived whiteness, which artificially enhances the maximum color gamut and black density of the printed image. Popular rag papers that contain OBAs are the Hahnemuhle Photo Rag, Somerset Velvet, and Breathing Color Elegance. These papers are known for their bright white surface and excellent color gamut and black density.
While OBA's appear to be an effective solution for enhancing the whiteness and overall image quality of inkjet paper, this conclusion is slightly premature. The fact is, that OBA's can pose a serious threat to the integrity and longevity of a fine art print by accelerating metamerism and causing color shifts, and yellowing over time. Let us explore each of these issues in further detail.
What is metamerism? Harald Johnson defines metamerism as a normal phenomenon relating to how the human eye perceives color. It occurs when "two different color objects have the same color appearance to a normal human viewer under one light source (metameric match) but look different under another light source (metameric mismatch)." (*1) To a printmaker, this means that the painstakingly precise color information applied to each print will be compromised whenever that print is viewed under a different light source. Thus, one primary goal of any printmaker should be to avoid metamerism in order to validate the time spent on color management and to uphold the integrity of the reproduction. After all, what good is a reproduction if it does not closely match the original?
Now that we understand metamerism and why it should be avoided, how do OBAs fit into the picture? When OBAs are exposed to UV light, the treated paper appears brighter and whiter. When OBAs are not exposed to UV light (in the evening), the OBA's "lose activity", causing your eye to actually see the paper color without OBAs - which will look creamy or somewhat yellowed. This amount of "OBA activity loss" will vary constantly depending upon how much exposure the paper has to UV light. Picture the lighting conditions inside of an art gallery and how they will change depending upon the time of day. This will have a subsequent effect on the art itself, as it is exposed to various levels of UV light throughout the day. For example, your print could be displayed in a gallery near a window where direct or indirect daylight may be illuminating the print. In a case like this, where there is a high UV component, inkjet papers that contain OBA's will strongly fluoresce and will appear bright white. However, in the evening when the same print is displayed with low or non-existent UV component (or incandescent tungsten illumination), the OBAs will not fluoresce, making the paper appear yellow, therefore causing your eyes to see the image color differently.
How does this happen? Think about it. Your "bright white" paper is profiled to your printer so that the computer can translate color information accurately to the substrate. Anyone with experience creating color profiles will tell you that the "white point" of your substrate is an integral component of a profile's accuracy. If the whiteness of your paper changes, so must your profile. This is precisely how OBAs are constantly working against your color management. As the perception of whiteness of the paper is constantly changing, so do the perception of colors. Here's a good test. If you can find a paper offered in both bright-white and natural-white, try using the natural-white paper printing profile on the bright-white paper. You will be surprised by how different your results will be.
Next, take both papers and observe the whiteness in broad daylight. The paper with optical brighteners should look extremely bright white, while the paper without optical brighteners will look creamy. Then, take the two papers indoors where they are exposed to no sunlight and observe the whiteness. You probably will not be able to tell a difference between the two. At the very least, you will notice that the paper with OBAs no longer looks so white and bright. Many times, the OBA-Free paper will appear whiter. Nevertheless, the important point is that your OBA-Free paper has remained consistent under both lighting conditions, while the paper with OBAs has been inconsistent. This inconsistency directly correlates to the inconsistency that your image color will have under different lighting conditions. Still, overall white point is only one of the risks associated with using substrates that contain OBAs.
Another problem with OBAs is that they have been known to decompose over time and can cause yellow stains to appear on your prints. It is possible to avoid this issue with UV inhibiting products and overcoats that are designed to reduce the UV activation of OBAs, but their effectiveness in this regard has yet to be proven. Therefore, regardless of the post-print protective coating that can be applied, the fact remains that any fine art print made on a paper manufactured with OBAs is a print at risk. To quote Henry Wilhelm from the Wilhelm Research Institute, "When long-term image permanence is an important consideration - or may eventually become an important consideration - fluorescent brighteners should be avoided".
This associated risk is precisely why OBA-Free papers have rapidly gained popularity in recent years despite their "Natural White" color, which could be considered creamy or even yellow. Of course some printmakers have chosen to use OBA-Free papers because they specifically like the warm tone of the paper, but the majority of the market is avoiding papers manufactured with OBAs because they (1) enhance metamerism and (2) they are a potential risk to the longevity and integrity of a substrate. A few examples of popular OBA-free papers are Epson's Ultrasmooth Fine Art Paper, and Breathing Color's Sterling Rag 210.
Printmakers who use OBA-Free papers simply eliminate the entire element of what can be called "OBA-associated Risk" from their business. These printmakers know that metamerism is a problem that should be minimized whenever possible - certainly never enhanced. Furthermore, OBA's have degradation potential and up to this point there is no guarantee that anything will last. Nevertheless, if an artist or photographer specifically requests that their artwork be printed on a paper manufactured with OBA's, a disclaimer should be issued, clearly explaining the facts and associated risks. Ultimately the customer should be left with the decision of how they want their art to look.
In an industry so obsessively tied to color accuracy and long-term print stability, it is a wonder why OBA-Free papers are not more commonly used than papers manufactured with OBA's. Art sells because of how it looks and in this business there is no room for error. Therefore, anyone who is involved in this relatively infant industry of selling printed art has genuine incentive to make color integrity a top priority. As further research is performed on the subject of OBA's, this industry will become more educated which will most likely cause a shift towards the widespread use of OBA-Free papers.
It is for this reason that Breathing Color has been conducting a great deal of research and development in quality paper manufacturing, which has resulted in the latest technological breakthrough "Chromata White". The Chromata White technology allows Breathing Color to create a highly stable white base paper/canvas without the use of harmful OBA's or any other fluorescent brightening additives. Color shifting is reduced by stabilizing the whiteness of the base substrate with a special anti-oxidation technology that even further protects printed images. Furthermore, metamerism is minimized by quenching the ultraviolet excitation wavelengths resulting in a more stable illumination of an image under different spectral power distributions.
By using Chromata White inkjet papers and canvas', printmakers now have the opportunity to get the best of both worlds. They eliminate all OBA-associated risk, and they have bright white surfaces to make beautiful prints that uphold the highest standards of color integrity that are possible today.
The best way to protect coated prints when stacking or sending out to ship would be to wrap the print in Glassine paper. You do not want to separate your prints with paper that contains acid in it. If acid comes into contact with your print it may cause the print to turn yellow. You can find many different types of Glassine papers online, or at your nearest art supply store. The main thing to keep in mind when looking for this type of paper is to make sure the paper has a neutral pH level, or acid free.
Once your print is in the frame, there is approximately 1/4" between the edge of the wrap and the inside of the frame. This space is helps give the illusion of the floating print!
The frame size you choose will be equal to the finished, stretched size of your print. For example, if you purchase an 8"x10" floater frame, this will fit a print that has been stretched with 8"x10" stretcher bars. The face (front) of your stretched print will be equal to the size of the frame that you purchase.
We are constantly improving our inventory, so check back often! Send us an email or give us a call with any feedback on additional sizes you think we should carry. We're always open to suggestions!
First, you start with a canvas print that has been stretched with stretcher bars--like our 1.25" EasyWrappe or 1.5" stretcher bars. We recommend using double-sided tape or hook and loop tape on the inside of the frame to mount your print. The advantage of mounting the print this way is that you can easily reposition the art in the frame to get it centered. Also, you can easily swap the artwork out occassionally if you desire.
Canvas floater frames are a unique way to display your 1.25" or 1.5"-deep stretched canvas prints. Your print sits centered inside the frame (using double-sided tape or hook and loop tape for easy swapping or repositioning of your art) appearing to float! The inside of each frame has a black finish to make it easy to replicate the "float" effect that artists used to try to achieve using black tape around the edges of their canvas prints.
This is commonly referred to as "ghosting." This is usually caused by the transfer paper moving during or shortly after pressing while the aluminum is still hot and ink continues to sublimate or transfer into the metal's coating. Here are the easiest ways to prevent ghosting:
Small surface imperfections are normal to a certain extent, due to the nature of the base metal. We do our best to cover these up during the coating process, but it is not always possible, and there is an allowable number of specks allowed per sheet, depending on the sheet size. We can better control pre-cut sheets, cutting around any imperfections as we go, so full and half-size sheets will likely have the most surface imperfections (this is one reason why the price per foot is lower).
Often, these small imperfections will not significantly affect the final print. Many customers who offer metal prints send along a small card that educates their customers on what to expect when purchasing prints on metal.
To prevent the transfer of oils and dirt from your hands to the inkjet receptive coating of the media, white cotton gloves should be worn when handling the media. When not using the media, you should store it in its original packaging, exactly how it was shipped to you. Read more about our recommended handling and storage best practices on our blog, The Art of Printmaking.
There are a few different things that can cause banding. Most commonly, you will see banding occur when there is a clogged nozzle or something else hardware related. Please follow the steps below to help identify the issue:
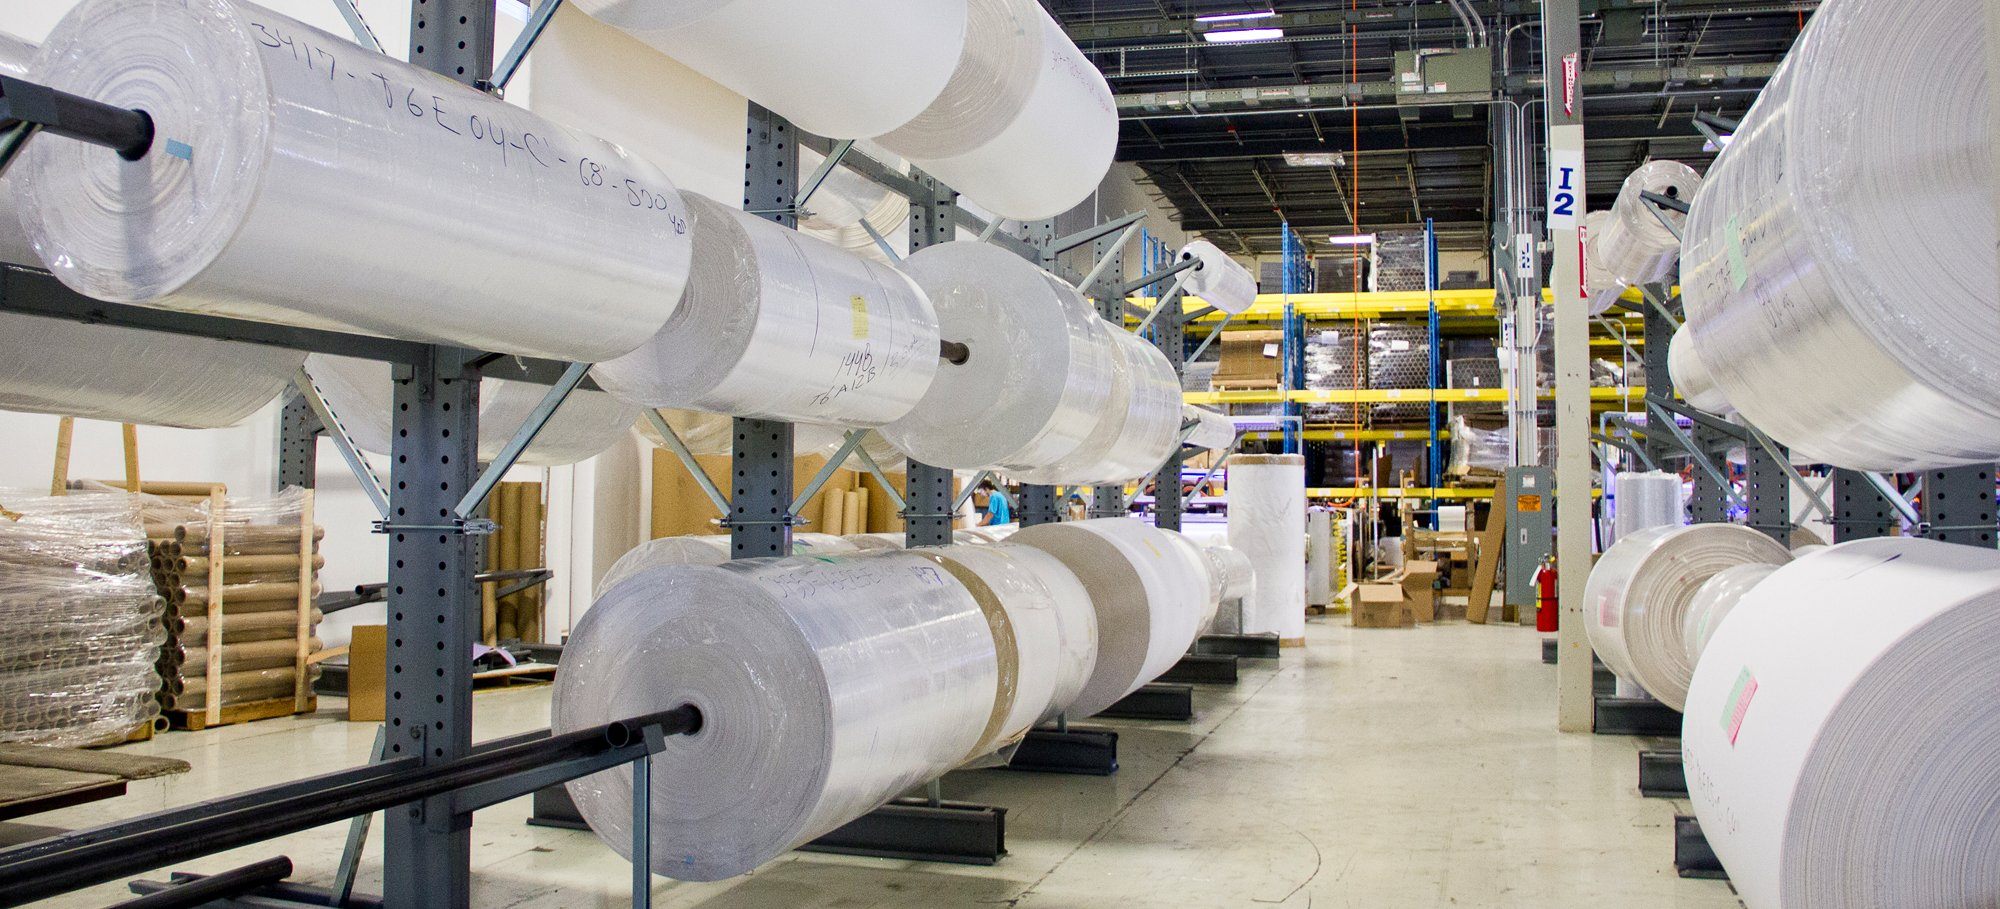
When shipping, paper sleeves can rub or scuff the surface of the media. By using a small strip of tape to hold the roll tight instead, we can avoid this abrasion. The strip of tape used here can sometimes leave residue behind on the media, so we compensate for any media loss by adding a few extra feet to each of these rolls.
Both Timeless and Glamour 2 print varnish have a 12 month shelf life when stored in our recommended storage conditions. We recommend a temperature-controlled environment between 65 and 75 degrees (F) and 35 to 65% relative humidity. Do not store in direct sunlight. It is preferred to store them in their original containers, with a tight lid.
Both Timeless and Glamour 2 have their place in the coating world. Timeless does not need to be diluted and dries very quickly, where Glamour 2 has a slower dry time and contains helpful leveling agents. Read our blog post here for more information on which Breathing Color print varnish would be best for you.
A white, cloudy appearance in the coating is typically caused by the canvas or fine art print not being allowed enough time to outgas after coming off the printer. Outgassing is basically the process of water evaporating from aqueous inks during the drying process. Outgassing time will vary dependent upon temperature, humidity, and the amount of ink that is printed on the media. It is always safest to allow 24 hours for the print to dry prior to coating.
Since each person's environment and use of these products can vary, it can be difficult to put a firm number to how much surface area a gallon of coating will cover. With that in mind, our estimates are as follows:
A gallon of Timeless: 300-400 sq.ft.
A gallon of Glamour 2 (diluted 30% w/ distilled water): 390-520 sq.ft.
These issues are typically caused by too much coating. Since canvas needs to absorb coating eventy, too much coating creates air pockets in the canvas. When the air tries to escape, it pushes itself out either partially (air bubbles) or completely (pinholes). If you notice these issues while the print is still wet, simply go over these areas with your roller with light pressure (Timeless) or no pressure (Glamour II). If you are spraying with an HVLP gun, try going over the print with a light 2nd coat as this usually fills in the pinholes and breaks the air bubbles. This must be done while the print is wet.
Timeless needs to be applied with pressure, but reducing the amount of pressure when you finish coating is important. If you notice roller marks while the print is still wet, simply go over them with firm pressure and reduce the pressure with each roll movement. After a few seconds, each roller mark should disappear.
Be sure that you have used the correct print settings/profile for your printer and canvas. If the wrong media type is used you could potentially print with too much ink. If there is excess ink this will only dry on the surface and when coating with a foam roller, the excess ink will be agitated and come out on the roller (and your print).
If you have insured the proper print settings were used, make sure you allowed enough time for the print to dry. Ink can come up when the roller has changed directions since its an abrasive move, which causes more friction. With Timeless, this is especially important since it requires pressure to apply. Always apply coating in straight lines as this will not damage the print at all. Read more about ink lifting from your print onto your roller on our blog post here.
This depends on a few factors (temperature, humidity), but in most cases a print coated with Timeless will be dry in about an hour. Under ideal printing/coating conditions (50-70 degrees F; 30-50% indoor humidity), Timeless can dry in about half the time.
Canvas absorbs a little more ink then a standard photo paper (where ink dries on top of the inkjet receptive coating, thus requiring less ink). Canvas needs to outgas before you laminate it. Outgassing involves water evaporating from the ink during the drying process. This is why it is also important not to stack prints until they are completely dry. After completing your print, allow up to 24 hours before coating to allow outgassing to complete. Read our blog post here for more about how long you should let you prints dry before coating, and why?
If you have any flakes or chunks of coating in your container, the easiest way to remove them is through a strainer. Just fill your measuring cup with the amount needed, and pour through a strainer into another cup (or container). The strainer will catch everything solid and you can just throw it out. Dont have a strainer? Use a coffee filter. Just grab a large cup or container and tape a coffee filter to the rim. Then, slowly pour your coating into the filter. A coffee filter takes time for liquid to pass through it, so pour a little at a time. This is a good trick because it will pick up anything that isnt pure liquid, and the end result is a perfect mix of coating. Read more on our blog post.
Our general rule is 2-3 minutes. To read more, click here.
Hopefully you have already watched our instructional video on "How to Apply Glamour II Veneer" which provides a very detailed look at how to apply Glamour II Veneer properly.
If you still have streaks, there are a few things you need to focus on:
(1) How much are you diluting with water? Try adding more water (at least 40%).
(2) Before adding the water to the coating, heat it in the microwave for about 8 to 10 seconds depending on how much water you are adding. The water should be above luke warm but not boiling. The heated water will help in mixing with Glamour II Veneer.
(3) When stirring the heated water and Glamour II Veneer together, stir lightly and slowly. If you try to mix them together too fast or too aggressively, it can create air bubbles that are difficult to get out of the coating once it is applied to the print. Once dried, these air bubbles are even more visible and can ruin your print.
(4) When you are first applying Glamour II Veneer to your inkjet canvas or fine art paper, be very generous with the application. Some of our customers even find success in pouring the coating directly onto the print in even lines across the whole print. Once this is done, the foam roller is then just used to spread the Glamour II Veneer around evenly.
(5) If you decide to apply Glamour II Veneer without pouring it straight onto the inkjet canvas or fine art paper and instead apply it with the foam roller directly, make sure to stay away from any bumby parts of the tray with the foam roller. When you are moving the roller around in the tray to saturate it with Glamour II Veneer, the bumbs can cause indentations in the foam which will transfer over to your prints and ultimately leave some service uncovered.
(6) Try to go over the print with the foam roller the least amount of times possible. We have found that the more times you run your foam roller over the Glamour II Veneer, the more coating you are actually taking off of the print. If you still see lines in the coating, wait until it dries to see if they go away. If you have been generous enough with the coating, the leveling agents in the Glamour II Veneer will cause the streaks to go away as it is drying.
(7) Apply the least amount of pressure possible when going over your inkjet canvas or fine art paper with the Glamour II Veneer. Pressure will cause indentations in the coating which will cause streaks once it has dried.
*this article will help if you have streaks, streaking, or lines when trying to apply Glamour II
Glamour II Veneer, like all varnishes and veneers, need to be dried before stretching or mounting. Glamour II Veneer is a water-based coating therefore drying time can vary drastically depending on where it is being used. In very dry climate, Glamour II Veneer can dry within thirty minutes. In very wet climate, Glamour II may not dry for two hours. The average drying time, however, is approximately 45 minutes to 1 hour. Glamour II takes 24 hours to fully cure.
The drying time for this product can also vary based upon your chosen dilution ratio. The more you dilute, the faster it will dry. If you don't dilute at all, Glamour II could take several days to dry. A minimum 20% dilution is normally required, although some of our customers have discovered their own method of applying without dilution.
Heat lamps are not suggested for drying Glamour II Veneer. In fact, cold air is the best way to dry Glamour II Veneer but be careful if you are considering a fan not to blow dust or debris onto a wet print.
We do not recommend an air pressure setting as not all guns, air compressors, nozzles, etc. are the same. Therefore it is recommended that customers using an HVLP gun to coat with test several different pressure settings and coating techniques to determine the best solution for each unique setup is.
We do not recommend storying Glamour II Veneer after it has been diluted. Only dilute as much as you will need when you are coating. Storing Glamour II Veneer after diluting can cause it to separate and harden.
Glamour II Veneer giclee coating can be rolled on with a dense foam roller, sprayed on with an HVLP gun (50% dilution), or used with a roll coating machine (50% dilution). Timeless giclee coating can be rolled on with a dense foam roller or sprayed on with an HVLP gun.
When rolling Glamour II Veneer you are going to want to dilute it down 25%-30% with warm distilled water. You can apply the varnish directly to the print, and then immediately start to roll it onto the canvas. Do not apply pressure to the roller, and make multiple passes in opposite directions. A good way to know if you are almost done rolling, is to listen for the "sticky" sound of the varnish. This means that the coating has been worked into the canvas and is starting to dry. The more time you spend working the varnish into the canvas, the faster it will dry and the better your print will look. Wait 30 minutes in between coats for Timeless and 2-3 hours for Glamour II. Please allow at least a full 24 hours for your print to dry before varnishing. You can find more information on varnishing on our blog.
Dilute more. If you dilute less than 30% with water, the more likely this is to happen. If you are diluting with 30% already, try 40% or even 50% to reduce tackiness. Make sure the coating has completely dried and is no longer sticky before storing prints face-to-face or putting them behind a temporary frame that you ultimately intend to remove. Also try using a thinner coat. If you are using too much product, this could happen.
Glamour II Veneer is a practically odorless water-based coating that can be applied in a closed room. It is NOT a solvent-based coating which in contrast are extremely hazardous and emit very strong odors. If you are more sensitive to chemicals and odors, or are generally concerned with health, then we would always recommend using a mask when applying any coating from any manufactuer -- just to be on the safe side.
Almost every problem that can occur with Glamour II, can be solved by using more of it. If you are experiencing cracking, chances are you did not use enough of it. Therefore, make sure when spraying your prints, that you always use 2 heavy coats. Though Glamour II is temperature sensitive and is mildly susceptible to environmental conditions, your prints should never crack if you have applied enough Glamour II. When applying Glamour II with a foam roller, you still should be able to get away with one coat, but make sure you apply the Glamour II generously.
Optimal drying conditions for our Glamour II would be 65 degress or higher and 60% relative humidity or lower. Also keep in mind it is always a good idea to have a low dust drying enviroment. It is not a good idea to have any type of fan on while drying varnish. If you have a high ceiling or cannot control the temperature at night, when out of the sudio/office, space heaters can be used to boost the average temperature and should not effect the integrity of the product.
Air bubbles can be caused by a variety of things. Breathing Color has tested every single possible variable to the foam rolling process of coating. Most of the time bubbles in the print are caused by "under rolling." You want to cover your print by going in multiple directions, not just one. The canvas has to "drink" the coating in. If you see bubbles at the start of your coating process, it is the canvas sucking the coating into the print. The desired dilution ratio of water to coating for Glamour 2 is 30% water 70% coating. There has been cases of bubbles forming from over diluted coating. Please allow the canvas 24 hours of dry time as well. After 24 hours when you come back to your print, youl will notice that the bubbles have disappeared.
The recommended water to varnish ratio is: 30% distilled water and 70% coating. It is very important that you distilled water, rather that tap or drinking water. The minerals added to drinking water will effect the integrity of the coating. Before mixing the water into the varnish, heat up the water in the microwave. Heating up the distilled water will help improve the effect of the self level agents leaving your print with no roller streaks. It is always safe to have less water than coating. A major problem with coating canvas is users over diluting the coating.
As long as you are using a water-resistant inkjet canvas or fine art paper with pigment inks you should have no problems with using Glamour II or Timeless. Both varnishes are water based liquid lamination coating that is practically odorless and is easily applied with a foam roller. We also have instructional videos on our blog which guide you through the liquid lamination (coating) process.
Once the print has completely dried, you should have no problem rolling it up. Keep in mind that when the print is exposed to extremely hot or humid temperatures, it may have a tendency to soften and stick to itself. For this reason it is always recommended to protect each print with a sheet of an acid-free barrier paper.
We made video that shows the process: Mounting Prints With Glamour II Giclee Varnish
It is always recommended to first seal your inkjet canvas prints with Glamour II or Timeless before attempting to hand embellish. You can also use Glamour II as a Texturizing Gel.
Managing your own color is hands down the best way to acheive predictable color on an ongoing basis. The ColorMunki is an easy-to-use, all-inclusive device that is best suited for the novice user or the user running one printer at a time. Read much more about the ColorMunki and color management here on our blog, The Art of Printmaking.
No. Both canvas finishes perform the same in terms of color output, density, gamut, and saturation. The only difference is the sheen of the canvas which does not affect the color output on Crystalline.
For borderless printing, the Epson print engine enlarges the image size slightly (about 5 percent or a bit less) to ensure that the image is not printed with any white edges due to paper misalignment. You can minimize the clipping by resizing your image to actual paper size (e.g., 13" x 19", 4" x 6"), and then setting Print with Preview to center the image and print it at 96% of actual size. The clipping dialog still comes up (it will whenever you are printing in the printer's defined margins), but tell it OK. You can try using 95% if there is still too much clipping.
Breathing Color manufacturers award winning fine art papers and canvas. We are not a fine art publisher. Instead, we sell to publishers who do fine art printmaking, and we also sell our products to printmakers who print on behalf of publishers.
If you are interested in submitting your images so that they can be used in our marketing samples, we are always interested in seeing new art that might be able to represent our inkjet media well. You can submit your images to info@breathingcolor.com .
Intelligence Representative
If your prints are going magenta it could be a number of reasons:
Matte Black (MK) ink is designed for Matte Papers and Photo Black (PK) ink is designed for glossy papers. The difference between these two black ink types is simple; MK prints a very dull, flat black, while PK prints a highly glossy, shiny black. Think in terms of flat black spray paint vs. glossy black spray paint. Generally speaking, the very best results and the deepest blacks for that particular substrate will be achieved by using PK with glossy substrates and MK with matte substrates. Your Epson printer manual will also provide you with a decent explanation of when they recommend using matte black ink or photo black ink.
That being said, wide-format Epson printers present a problem for those who wish to maximize their output potential by offering both matte and glossy papers as available substrate options. This is because Epson machines are built to run either the PK or the MK, rather than allowing the printmaker to switch blacks from print to print. As a result of this quandary, those who own wide-format Epson printers must make an important decision What type of prints do I want to be best at? In other words, if 80% of your printmaking business is fine art on matte papers and matte canvases, naturally you will want to run your Epson with MK, which will render the highest black density on your primary substrate line. Likewise, if you are a photo lab for example and mostly reproduce photography on glossy papers, the PK is the more intelligent choice as it will render the glossiest black, which is most desirable on glossy substrates (to avoid a gloss differential).
Traditionally, most all inkjet printable substrates, matte or glossy, will work with the PK ink. Though the maximum black density (DMAX) would be significantly less, the print is otherwise unaffected. This is not true of the MK ink. When most glossy or semi-glossy papers are introduced to the MK ink, the ink will run and bleed, rendering the print completely unusable.
How to change the photo/matte ink in the Epson 7600 and 9600 printers without using the costly Epson draining procedure:
1 - Make sure your printer is not switched on
2 - Open the ink cartridge lever in the ink cartridge bay
3 - Replace the photo black cartridge with the matte black cartridge (or vice versa)
4 - Leave the ink lever open !
5 - Using the printer control panel go into Maintenance Mode 2 by switching power ON while pushing the 'Paper source', 'Cut/Eject', and 'Paper Feed down' buttons.
6 - Press the 'Paper Feed down' button until you see "SERVICE CONFIG" on the display - press the 'arrow right' button. It then shows 'XXD' in the lower part of the display.
7 - Press the 'Paper Feed down' button until you see "NPD" - press 'arrow right' button. A value of '1' appears in the display.
8 - There are 3 possible value settings for NPD:
0 - no ink check
1 - pigmented ink (there should be s star "*" at this setting)
2 - dye inks
9 - Change NPD setting to '0' (no ink check) and press "Enter" - a star should now show next to the '0' value
10 -Switch printer off
11 - Switch printer on
12 - Close the ink lever in the ink cartridge bay
13 - Printer and driver shows the matte black ink is installed (or photo black ink)
You can use the same procedure to switch from matte black to photo black or from photo black to matte black. What happens is that once you change the ink in that way the printer re-sets the 'NPD' value back to '1' the next time you switch on the printer in the normal way (non maintenance mode).
If you are using the ImagePrint RIP (Raster-Image Processor) from Colorbyte, most of our inkjet canvas and fine art papers have been profiled by their technicians and are available for free download on their website. You may obtain them by clicking here
*this article will help if you are looking for Imageprint profiles, Colorbyte profiles, profiles for RIP, RIP to use with Breathing Color
If you are using a RIP from Colorbyte, Onyx, Wasatch, Ergosoft, or any other, you will need to contact them and they will be able to make you profiles for our papers. Please contact one of our media specialists who you can speak to you about receiving a credit for a specific amount of material that you can send to your RIP manufacturer. Typcially, no more than 5 sheets of 11"x17", or the equivalent amount of square feet on a roll, are required. Your RIP manufacturer should be able to get this done within a few weeks.
If you are looking for a ICC Profile for a particular product navigate to that products webpage on our website. You will find an ICC profile tab at the top of every Breathing Color product page that will link you directly to profiles for that product. Simply scroll through the list of profiles to find your printer and ink combination and press the download button and thats it!
If you still need help Click Here to see a video of the process.
You may have downloaded the wrong ICC Profile. If you have downloaded profiles for an Epson printer using MATTE black ink, and the "Watercolor Paper Radiant White" setting is unavailable, then you must be using PHOTO black ink. If you follow the link below it will bring you to the index of all Epson ICC profiles.
http://www.breathingcolor.com/support/index.php?_m=downloads&_a=view&parentcategoryid=1&pcid=0&nav=0
Depending on what type of ink you are printing with, (matte or photo black ink) will determine what media type you will choose. Make sure you know this information before you download an ICC profile.
Here are the steps you would take to manually track down the file and delete it from your hard drive:
By using these steps you are going to be able to track down every file on your hard drive ending with the file extension of .ICC
-Go to your desktop.
- Click the Start button.
-Click search -> Files or Folders -> All Files and Folders -> All of part of the filename:
and type: *.ICC
Once you have located the file on your computer, you can choose to manually delete it, by right clicking the file and selecting delete. Or you could choose to leave it on your computer and go about downloading a new profile for your media. By default Photoshop will save all profiles to your hard drive, and have the option to select which profile you want to apply each time you run a print. If you have any further questions on how to install profiles be sure to check out our instructional video on ICC profiles. It goes into great detail on exact steps you will need to take to install an ICC Profile.
Print Permanence Ratings are longevity tests performed by companies who have the equipment required to conduct accelerated light exposure tests, dark aging tests, and humidity tests. The purpose of the testing is to determine the life expectancy of a digital inkjet canvas or inkjet paper print before "deterioration" occurs. Common examples of deterioration include yellowing, staining, or fading.
To the dismay of their users (and trusting believers in the Print Permanence Rating), various inkjet papers with high print permanence ratings failed to meet their expectation and instead began deteriorating within months and in some cases days after being printed. How could this happen? It's very simple, actually. Once you begin scrutinizing the longevity testing method that gave the high rating, multiple flaws are evident. For example, while factors such as light might be tested for, other common environmental factors are left out, such as exposure to certain chemicals in carpets, stretcher bars, wrapping paper (we hope you don't wrap your finished prints in brown Kraft paper), boxes (such as the box your roll of paper or sheets came in), etc., etc. etc. In other words, Print Permancence Ratings are created "in a bubble". Unfortunately, printmakers dont have that luxury.
While it's true that scrutiny of these testing methods discovered a series of flaws in the process of developing and publishing a Print Permanence Rating, the purpose of this article is not to scrutinize these flaws nor witch hunt the messenger of the Print Permanence Rating. That would be a waste of time. Instead, the purpose of this article is to expose Print Permanence Ratings for what they really are -- a marketing tool. Should a product not live up to its rating, users need to understand that they will receive absolutely no recourse in some cases, not even a refund for the price of the roll or box of sheets purchased. Ratings are no guarantee of longevity. So first and foremost, dont be fooled into thinking that they provide any sort of financial guarantee to you or your business.
Every Print Permanence Rating is accompanied by a liability disclaimer from the product's manufacturer. Here is a common example:
Actual print stability and longevity will vary according to image, display conditions, light intensity, humidity, atmospheric conditions, ink, and post printing treatments. (Manufacturer name removed) does not guarantee stability or longevity. For maximum print life, display all prints under glass or lamination or properly store them.
You can find these disclaimers with every manufacturer or OEM in this industry. The bottom line is that Print Permanence Ratings are a marketing tool that encourage confident use but in reality provide absolutely no meat and potatoes for the consumer. Why? Because when your prints turn yellow, fade, stain, or deteriorate in any other way, and when your customers want their money back, after you spent thousands on ink and countless hours in production -- you simply won't be getting any recourse. Read the disclaimer again -- once you buy the product, you assume your own risk. So the next time your local supplier or any other supplier of inkjet goods tells you about a Print Permanence Rating or a guarantee, try qualifying it. Ask them to tell you exactly what recourse you will receive from them, or from the manufacturer, should the product fail to live up to its rating. You might be surprised to see just how many people in this industry are still fooled into thinking that some guarantee actually exists -- even the suppliers.
So the next obvious question is: Why won't canvas, paper, or ink manufacturers give us consumers a guarantee on longevity? The problem with providing a guarantee on any inkjet print is that there are just too many uncontrollable factors involved that can contribute to the deterioration of a print. As seen in the disclaimer posted above, examples of such factors include display conditions, exposure to UV light and its intensity, humidity, atmospheric conditions (let's be honest, this could include just about anything), ink, and post printing treatments. Other examples include exposure to certain chemicals in carpets, stretcher bars, wrapping paper (we hope you don't wrap your finished prints in brown Kraft paper), boxes (such as the box your roll of paper or sheets came in), etc. A manufacturer simply cannot control such a myriad of factors a consumer could so likely and even unknowingly expose a print to.
Given such numerous factors and potential hazards, it is easy to understand how Print Permanence Ratings in reality are created in a bubble. Print Permanence Ratings are created in the perfect environment, in a controlled laboratory, with only select external conditions (such as light and humidity) -- and most importantly, the end goal of achieving the highest rating possible. The bottom line is that you will never achieve this rating in the real world, so don't be surprised when you don't. A Print Permanence Rating certainly doesn't tell you what to expect should you introduce other external conditions, such as exposure and/or contact with acidic cardboard or paper (a very common occurrence, unfortunately) for unspecified periods of time, or any other potential unmentioned pitfall. They simply don't address the consequences one can expect when such factors are introduced. So just because a product has a print permanence rating of say 90 years, in reality, history has proven that such a product could deteriorate within months or even days. It has happened before, and it will happen again.
All in all, the subject on Print Permanence Ratings ultimately brings us to question what consumers can do, or what factors they can control in order to maximize the longevity potential of their own inkjet prints. We will answer that question in the next article.
We sell both Allure Fine Art (aqueous) and Allure Dye Sublimation metal panels in pre-cut sizes. If you are looking to save money per sq.ft., or to achieve custom-sized cuts on a regular basis, you can also trim the metal down yourself.
To do this, it is very common to use a metal shear, which is designed to cut thin aluminum. These come in a wide variety in terms of width, manual or hydraulic operation, foot or hand-driven, various features, etc.
Many customers will opt for a shear that is at least 50"-wide, which will accommodate half-size (4ft x 4ft) sheets. A manually operated shear at this width will cost you approximately $1,500 and will go up as you add sizes and features.
Another option is to use a CNC router. This is common for the higher-volume labs and studios. These come in just as large of an array of sizes and options. Prices will start at approximately $20,000 and go up from there.
Trying new products can be an exciting experience, but can also be a disappointment if the first print does not end up way you want it to. This is why its important to make sure that you not only print with the proper settings, but you also print with great test images. We offer trial rolls for all of our products to give you the opportunity to run test prints, build profiles, and ultimately compare it to what you currently have. When you receive your trial roll, youll want to download and install the right profile. Get more detailed information about how we recommend testing our different products here on our blog, The Art of Printmaking.
While we do not offer any free, small sample strips of paper, we do offer trial rolls (which measure 17 x 10) at our cost for many of our canvas, fine art, and photo papers. These trial rolls can be found and purchased at the bottom of any product page. We also carry the Breathing Color Sample Pack which includes two unprinted letter-sized sheets of six of our most popular fine art papers. We offer samples this way to allow everyone to fully test and evaluate their own prints on Breathing Color media.
For testing and evaluation, we offer short trial rolls of all of our inkjet canvas, inkjet fine art paper, inkjet decor paper, and inkjet signage products that are sold at cost. Typically, trial rolls are 17"x10 feet. The purpose for this is to allow our customers to conduct a comprehensive evaluation of our products, cost effectively. There are several steps that should be taken when testing any new digital substrate for your printing business.
1. The substrate should be tested with several different images to be sure the product performs well with everything image-type that you intend to use it for (try a portrait photograph, a vibrant fine art print, a black & white piece, etc.). Make sure you are selecting images that are fairly different from one another with respect to color and tonal gradation for a thorough evaluation.
2. Show a few of your most important customers a print of their own work on the media you are testing. Maybe provide an example of your current media to illustrate a comparison. Explain the physical and archival attributes of the new substrate and the reasons that you are considering a switch. It is the printmakers job to educate their artists about all things printing-related, especially media.
3. Trial rolls provide enough media to create custom profiles, for those who are capable. Breathing Color also offers a free custom profile service, which requires approximately two square feet of printed media.
4. It is important to have enough media to leave a margin for error in case the first attempt had not been printed correctly (print settings, profile, platen gap, etc.).
5. For inkjet canvas: coating, stretching, and hand embellishment should also be tested.
In addition to trial rolls, Breathing Color offers a complimentary sample pack, which includes printed samples of all available fine art products, with any order (limit one per customer). These sample packs can be purchased separately for $19.95.
We do our absolute best to package our customer orders with good quality boxes and packing materials strictly because it is a necessary step in delivering a "love at first sight experience" to our customers. Unfortunately, when your order leaves our shipping facilities it is out of our hands and in the hands of freight carriers who can negatively impact our protocal despite our best efforts. Occassionally, our customers receive packages from UPS that have been egregiously damaged in some way. Damages include:
- boxes being ripped open in some areas leaving exposed product or damaged product
- boxes being wet from being left in the rain or subject to an accident
- boxes being severely dented or distressed, causing damage to your products
When UPS does this, you are entitled to recourse. The recourse amount will be the insured amount, and rest assured Breathing Color insures every single order for the full amount. Based upon our experiences, here are the procedures you need to follow in order to be eligible for recourse:
(1) If you have not opened anything yet, take some digital pictures of the damaged shipment
(2) Save every damaged box because UPS will require to see it for themselves
(3) contact UPS and submit your complaint immediately
Breathing Color uses 3 different shipping methods for our customers in Hawaii. We can send your products UPS, FEDEX, or DHX. To get the cheapest shipping rate you would go with DHX which has the ability to use ocean freight. It is the cheapest but will take the most time to get to you. If you know what you want to order ahead of time, it is a good idea to place your order 3-4 weeks in advance to keep your shipping rates low as possible by going DHX ocean freight.
To receive additional information about products or shipping methods please call us on our toll free number 1-866-72-COLOR and speak with a Breathing Color Media Specialist.
Our customers use a wide range of different staple guns from the hand-held mechanical type, to electric, to pneumatic ones. The one that's best for you will depend on your budget and your volume. Low volume printers will be fine with the hand-held versions, while higher volume will be best of with an electric gun. Many say that pneumatic guns are the most durable and repairable in case of damage. These pneumatic guns are of course often the most expensive ones.
We make the StretchRelief canvas stretching pliers specifically to stretch canvas prints quickly, easily, and as tight as possible. All without putting strain on your hands and wrists. Find out more!
Pre-notched stretcher bars are easy to assemble--simply slide the notches together to build your frame. No joining equipment is required to assemble the frame. Stretching pliers and a staple gun will be required in order to stretch your canvas prints.
Our 1.5" wide pre-notched stretcher bars are made from high-quality fir wood.
The EasyWrappe extenders enable you to create stretcher bars at custom sizes that are not normally offered on our product page. See our blog article for photos and much more information.
Yes! They do. Included in each order are the same number of corner braces as EasyWrappe or EasyWrappe Pro bars. For an order of 10 bars, you would get 10 corner braces.
The corner braces on the EasyWrappe Pro bars use a friction fit and due to external environmental factors the wood may expand causing the braces to come loose. Moving the canvases from location to location may also cause this to happen. Glueing the corner braces in place helps prevent this from happening. You can also use a small screw at each end of the brace.
Yes, because of the unique design of the tool finishing off the wrapped corner is easy and effortless. The extension on the bottom jaw, which is the fulcrum or pivoting point for stretching, has a notch on either side of it. Once you have folded the canvas and youre ready to complete the wrapped corner, the notch on the bottom jaw will allow you to stretch the canvas on top of the stretcher bar. This unique feature also allows the tool to stretch over forty-five degree and center supports on larger stretcher bars. You can view this in the demonstration in Figures 8 and 9 of the user manual.
This depends on the skill level of the user. Once youve become adept at using the tool you will able to stretch a 24x36 inch canvas, including the gallery wrapping, in about eight minutes.
The grasping pins in the top jaw in conjunction with the locking pliers do all the work. The weight, resulting from the solid steel construction, also helps the tool do the work for you. When the tool pivots off the extension on the bottom jaw the tool is engineered to eliminate the need for any hand strength. This is a totally new concept for a hand held stretching device. All of the stretching pliers on the market rely on the users ability to continually squeeze down on the handles to hold the canvas. This results in tremendous hand fatigue after just a few stretches. With the Stretch Relief™, you will be able to stretch all day long and your hand at the end of the day wont even know youve been working. Youll also notice that your canvases are completely wrinkle free and tighter than ever before.
The StretchRelief™ will easily gallery wrap on any type of stretcher bar. The amount of canvas that you need extending beyond the inside of the stretcher bar is three quarters of an inch. For example: if you are stretching on a standard three-quarter inch thick stretcher bar, you add three quarters plus the width of the bar which is typically one and a half inches. To this amount you would add three quarters of an inch which would give you a total of three inches. Accounting for both sides you would double this number which would mean that your total extra canvas beyond the image size would be six inches. Using this formula for gallery wrapping an 18x24 inch frame, you would need a canvas size of 24x30 inches.
Large stretching machines not only require a substantial investment for the machine itself, but also require the use of an air compressor. In side-by-side testing, the StretchRelief™, at a fraction of the cost, has been found to give a much tighter stretch than any other stretching device on the market today. The StretchRelief™ also makes it easier to keep the image centered on the stretcher bar because you are able to monitor the positioning of the stretched image as you work.
Our clients who have used both a stretching machine and our StretchRelief™ tool have reported greater success and satisfaction with the StretchRelief™.
The StretchRelief redefines the concept of a stretching plier. Unlike conventional pliers, which have a very limited life span, the StretchRelief™s precision machined design will give you thousands of stretches. With the StretchRelief™ you will now be able to greatly increase your production output for a relatively small investment. Breathing Color has finally solved the otherwise difficult problem of gallery wrap stretching with this amazing and cost effective tool.
Yes. Once you have tightly stretched the canvas the tool is designed to lay the canvas down flat on the back of the stretcher bar. You will be able to shoot the staple in all the way, every time. You can view this in Figure 6 of the user manual.
Yes, StretchRelief™ works equally well for standard stretches. Simply move the stretcher bar over to the edge of your working table and shoot the staple in the side.
Display life of any media will be greatly decreased by an extreme environment. Art Peel is no different. No immediate adverse effects should be present, but overall lifespan will certainly suffer if it's in extreme temperatures or high humidity.
We consider the Art Peel a product designed for "short term" display. A couple of years maximum, with ideal conditions. It's a fabric so will suffer the normal wear and tear on the wall unless it's laminated. Lamination will usually help with dust, moisture, and UV exposure just like any other media.
No, none. The Art Peel can be removed and re-applied many times without worrying about your wall or surface.
Art Peel can be re-positioned months after being applied.


