A quick and easy way to save you time by recalling each of your media settings with just one click of the mouse.
Are you tired of being forced to use generic settings that are already built into the Epson print driver? Do you wish there was a way to store your media specific settings to quickly and easily recall later?
Believe it or not, but there is a way to do it, and it’s already available with your current driver! Follow this quick guide to see how you can setup your own customized settings and use them later with just one click.
Let’s setup customized settings for our new Pura Smooth Fine Art Paper. After we’ve setup these custom settings, we will save them for future use. Here’s how:
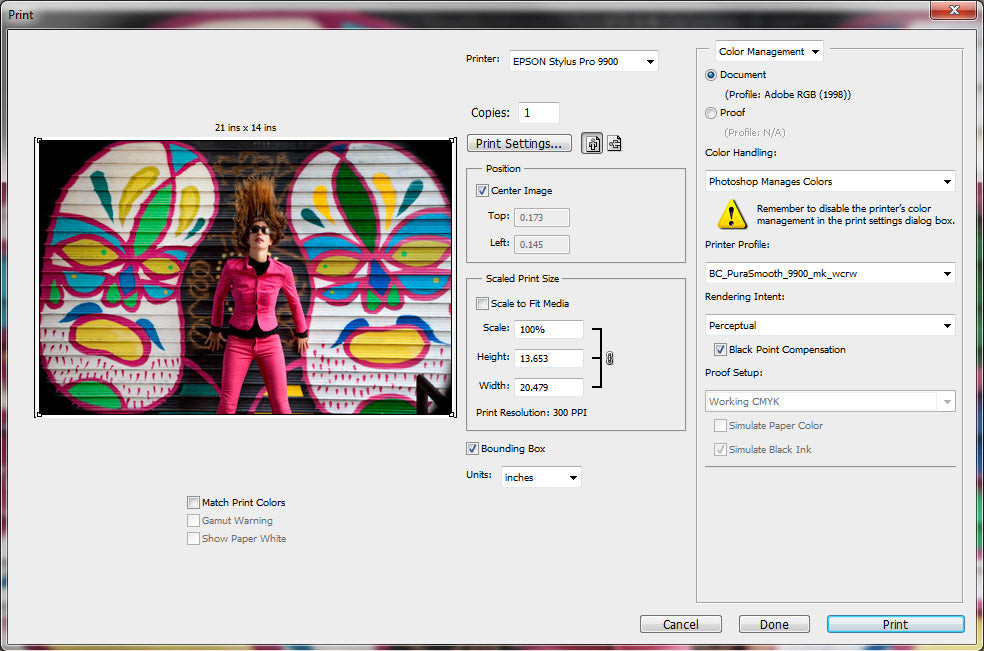
Step 1: File Menu>Print. Adjust your settings so you see what’s listed here (Click on image to enlarge):

Step 2: Click on Print Settings (Page Setup if using a Photoshop version prior to CS5), and adjust your settings to what you see here (Click on image to enlarge):

Step 3: Open the Paper Configuration window and set the Platen Gap to “Wider”:

Step 4: Now, let’s save our settings: Next to Select Setting a the top of the window, click on Save/Del…

Step 5: In the window that pops up, enter the product name in the Name field and click Save:
All set! You can now recall all of these settings simply by selecting your new preset:
This is a quick and easy way to save you time by recalling each of your media settings with just one click of the mouse. Do you have any additional tips to add? I’d love to hear them!


