

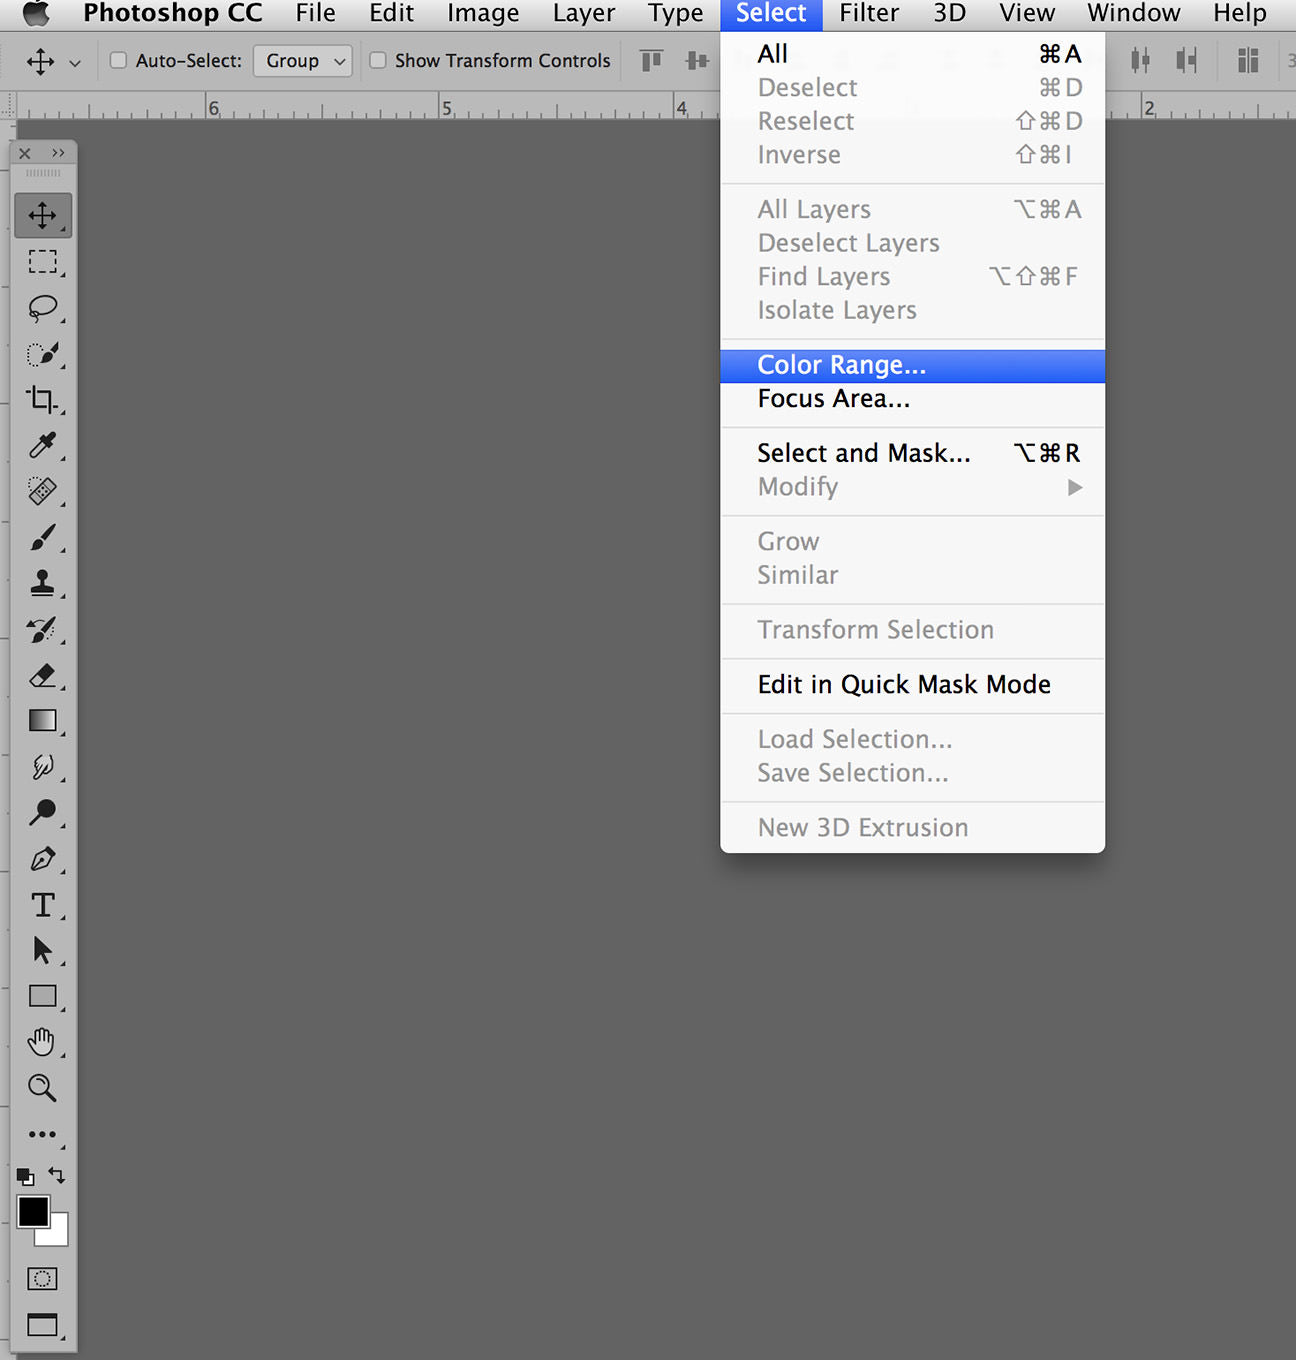
How to use Color Range in Photoshop – overview of the tool options, and then use Color Range to transform the colors of specific areas in an image.
As with all of the selection tools in Photoshop, putting in the time to master Color Range will reward you for years to come.
The more quickly and efficiently you can navigate Photoshop as a professional digital artist, the more money you stand to make.
ie: If you complete a job worth $200 in five hours, you’re making $40 an hour. But you may be able to tune up your skills and refine your understanding of Photoshop to the point that you could complete that same job in just one hour, earning you $200 an hour.

Learning this tool is a great way to do that. So let’s get into how the Color Range tool works and look at some samples.
Hope that helps some of you out that would like to return to this guide later or print it out!
More from our Popular Tools in Photoshop series:
Overview: The Color Range Tool Options
Color Range is located in the Main Menu Bar.
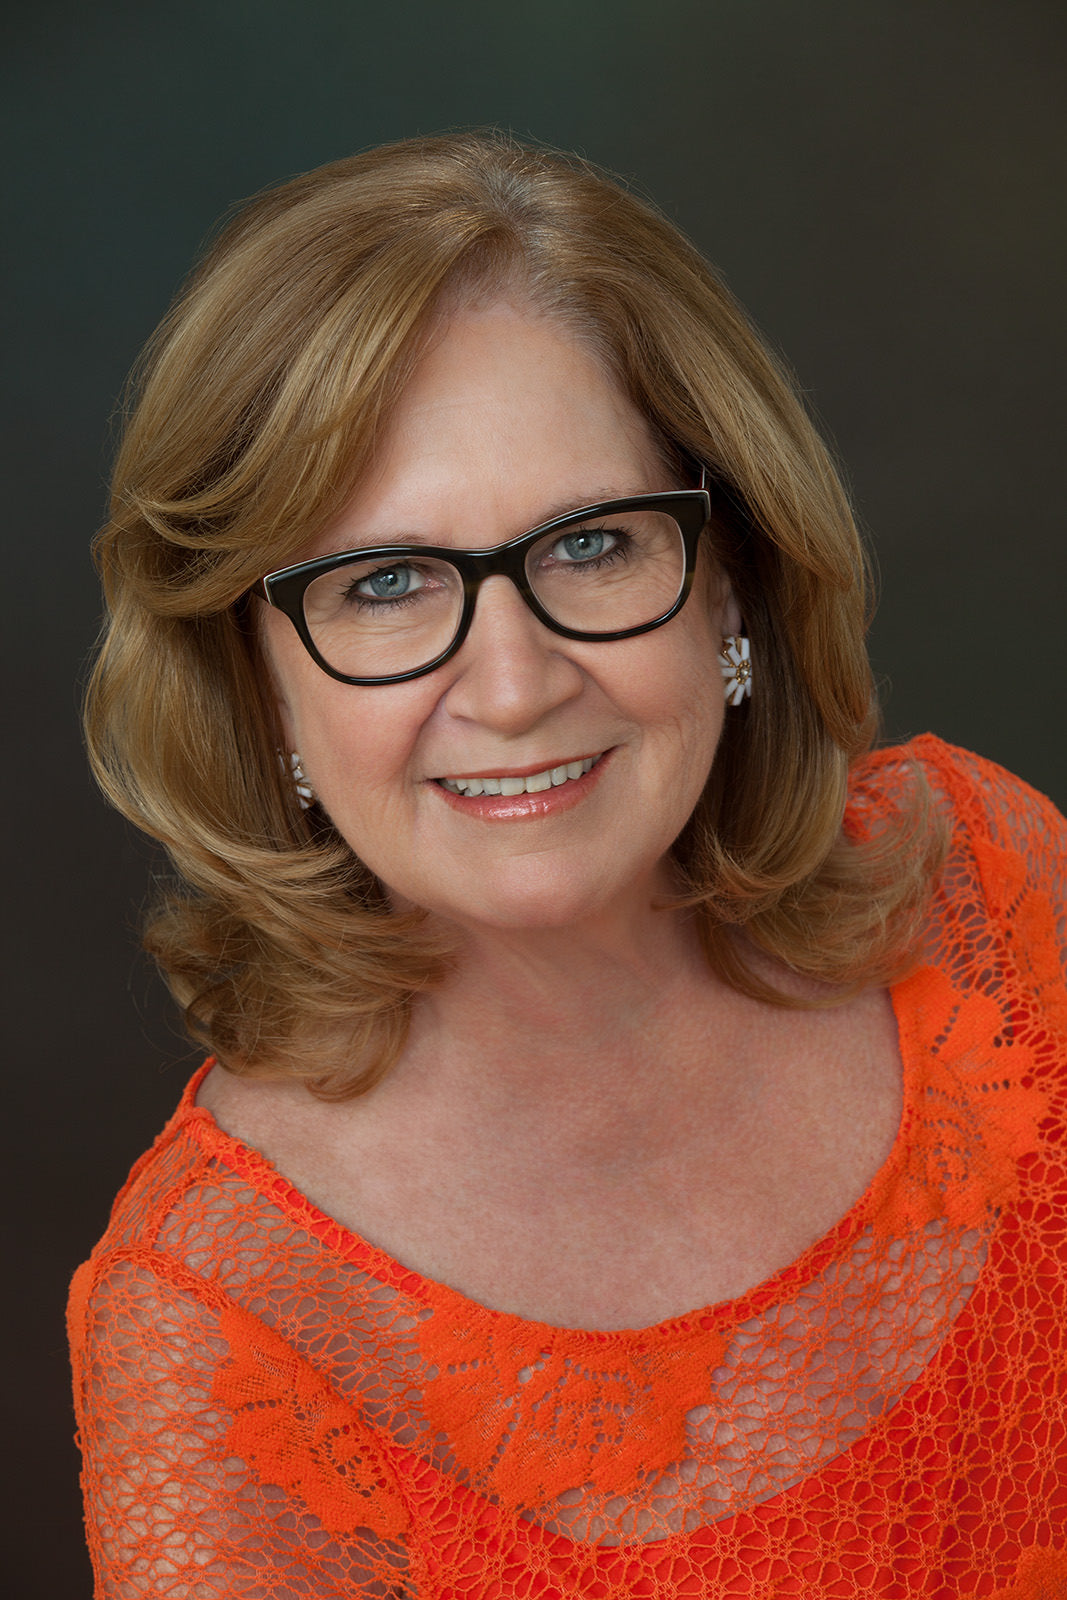
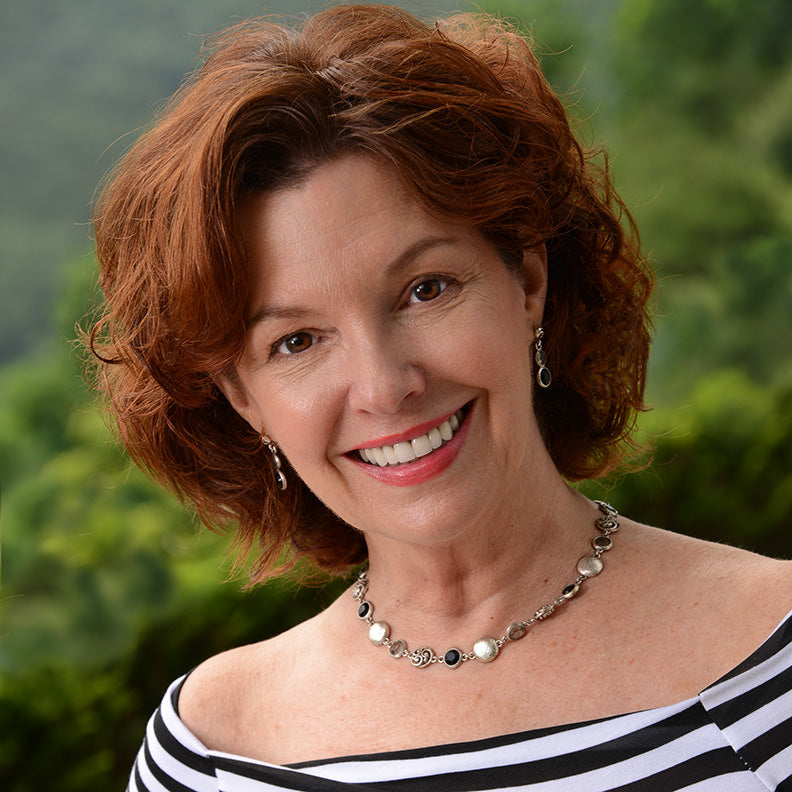
This woman’s orange top, should we want to change the color of it, is a good example of when Color Range might be a good choice of selection tool.
Other than the woman’s lipstick color, there is little orange in the rest of the image file.
Pre-Selecting With The Lasso Tool
In order to use Color Range on the blouse without also affecting the woman’s lipstick color, the blouse area can be loosely selected with the Lasso Tool prior to choosing Select / Color Range from the Main Menu Bar.
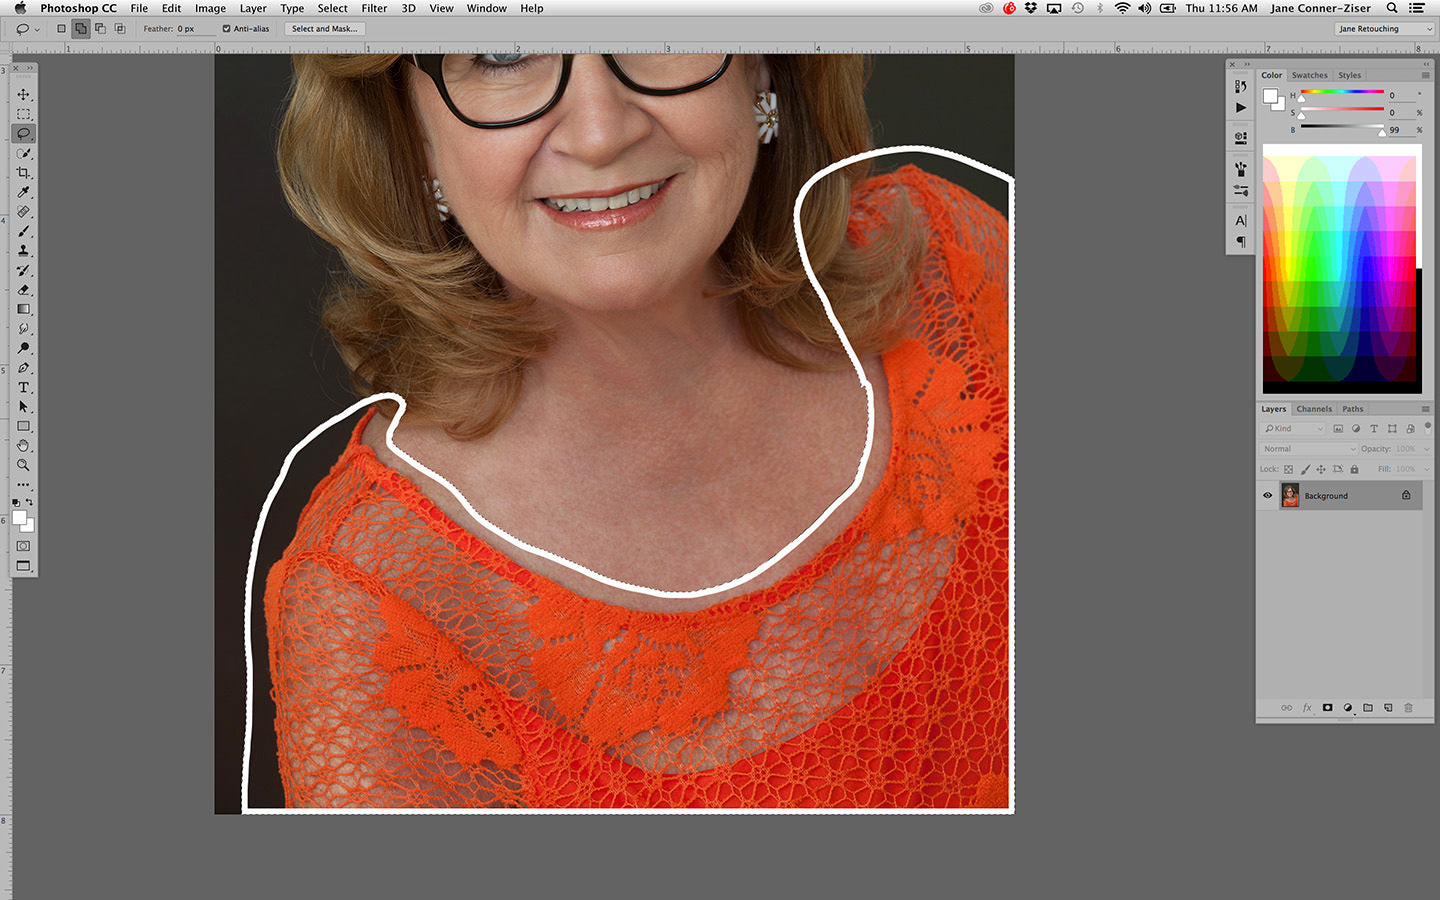
The white stroke illustrates where the pre-selection might occur in order to fully isolate the blouse from the rest of the image.
Selecting Specific Colors
The next step is to choose Select / Color Range from the Main Menu Bar.

The Color Range panel contains several options that help the user make almost perfect selections.
It opens with white, identifying what is currently being selected, but it can be changed simply by clicking either on the color you want within the image on screen, or the area representing it within the preview window.
My Color Range opened with the orange already selected.
The Selection Preview allows you to see what you are selecting in a variety of ways.

These views are very helpful when checking the selection prior to accepting it.
I will generally begin with None selected, but will look into the other views to see if I’m getting too much or not enough of the color I need.
Color Range also offers ways of selecting specific colors after opening it from the Main Menu Bar.
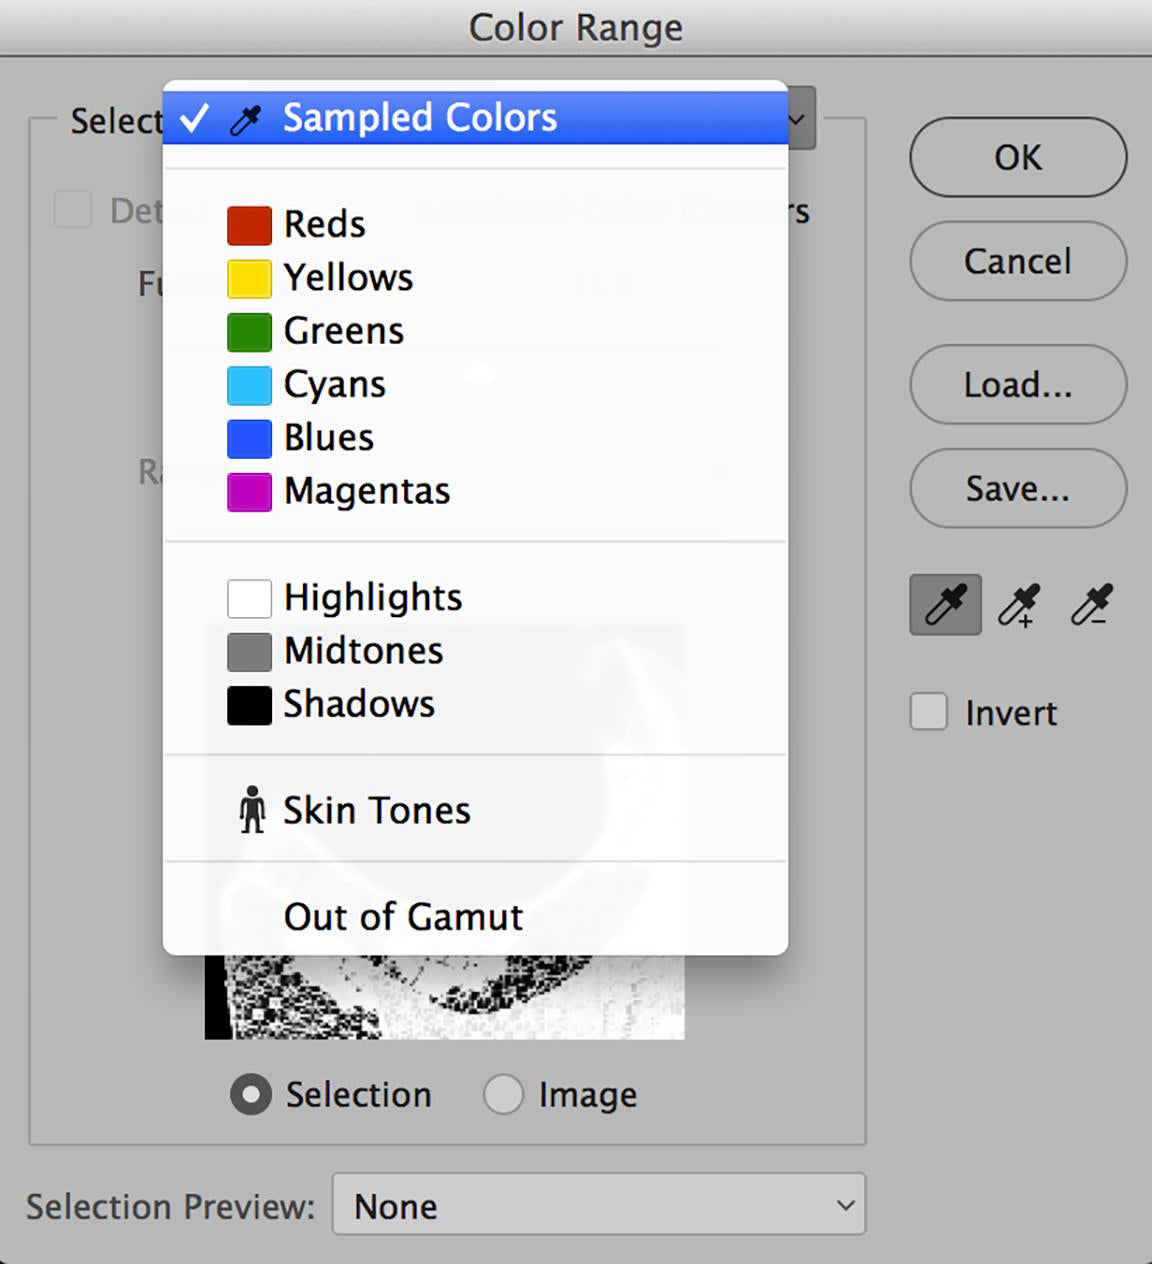
Adobe provides the basic pure forms of primary and secondary colors and a means of selecting just Highlight, Midtone, or Shadow values determined by pixel value within Photoshop’s 0-255 tonal range (highest third = highlights, middle third = midtones, lower third = shadows).
Selecting Skin Tones
There is an option for selecting flesh tones and a means of identifying colors in the image that are out of gamut or outside the range of colors that can be displayed or printed accurately.
Had we chosen to bring in the entire layer instead of just the pre-selected blouse and then chosen to select Flesh Tones and checked Detect Faces, our selection (represented by white) would look something like this:
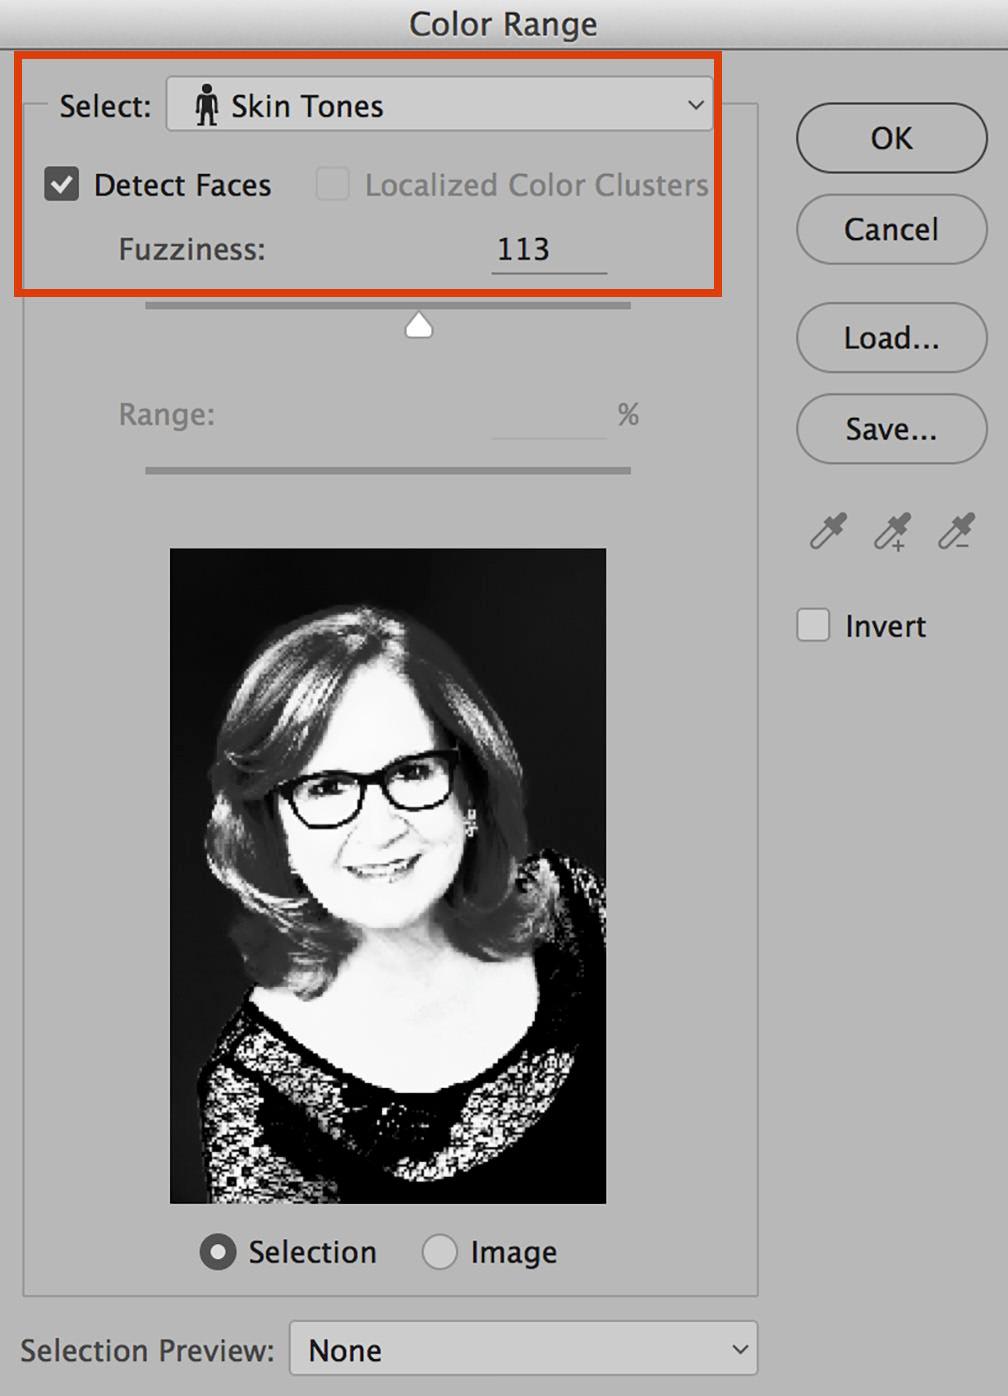
Detect Faces uses facial recognition technology to provide a more accurate selection of skin tones.
Localized Color Clusters
When Localized Color Clusters is checked, Photoshop looks for and selects contiguous or neighboring colors – colors that are next to, or bordering each other.

The Fuzziness Slider
The Fuzziness slider is used to adjust the fall-off beyond the selected color boundaries.
In other words, it adjusts how much tolerance of surrounding tonal range and colors that will be accepted into the selection.
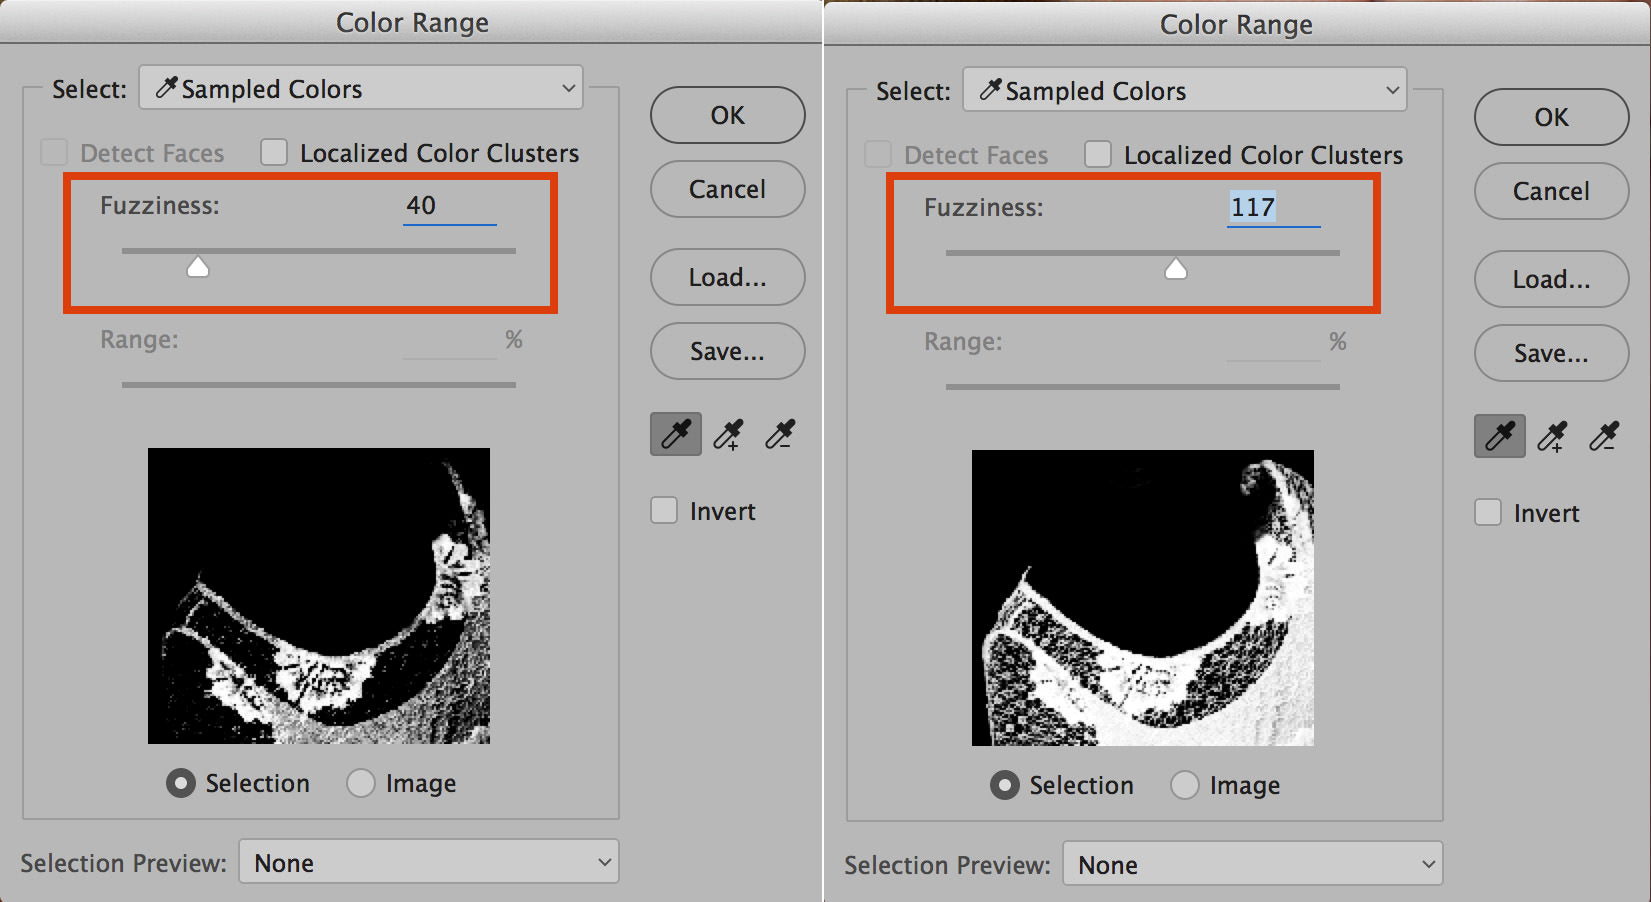
A low Fuzziness number selects colors very specifically.
A larger number is more tolerant of variances and provides a wider range of hues and tonal values relative to the selected color.
It’s possible to add and subtract colors in Color Range using the icons within the Color Range Window, or by using Keyboard Shortcuts.
The Eyedropper Tools
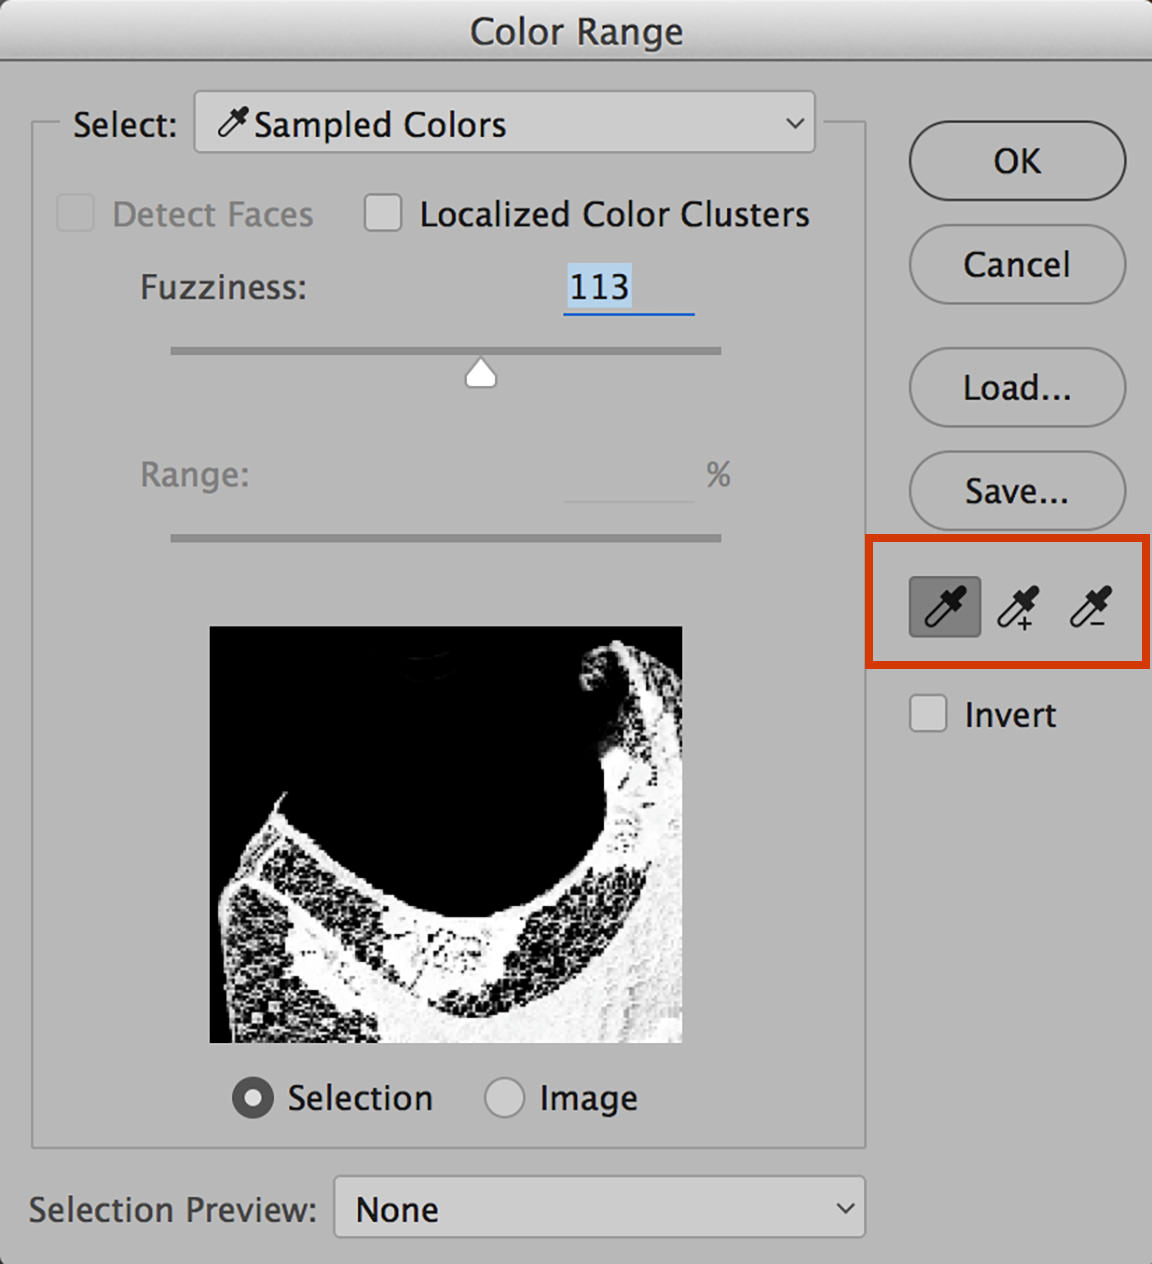
The eyedropper icon on the left is the main color selector.
The plus eyedropper tool in the center allows additional colors to be added, whether they are related or not, to the original selected color (Keyboard Shortcut – Shift) and the icon on the right allows colors to be subtracted (Keyboard Shortcut Option or Alt).
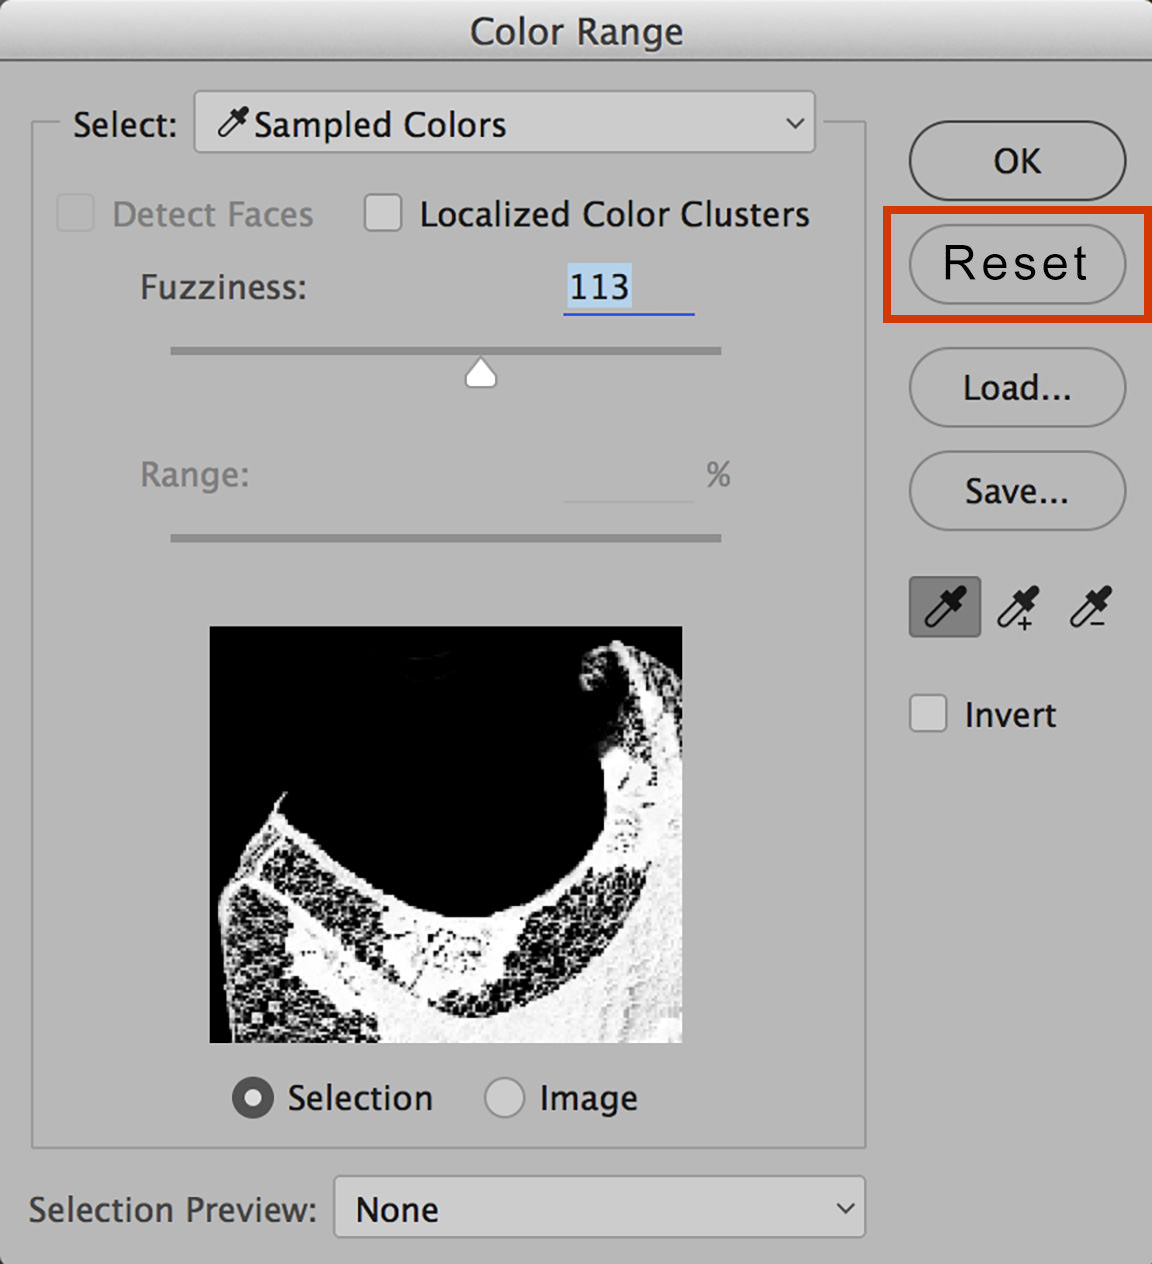
Loading and Saving
Work completed within Color Range can be saved and used again.
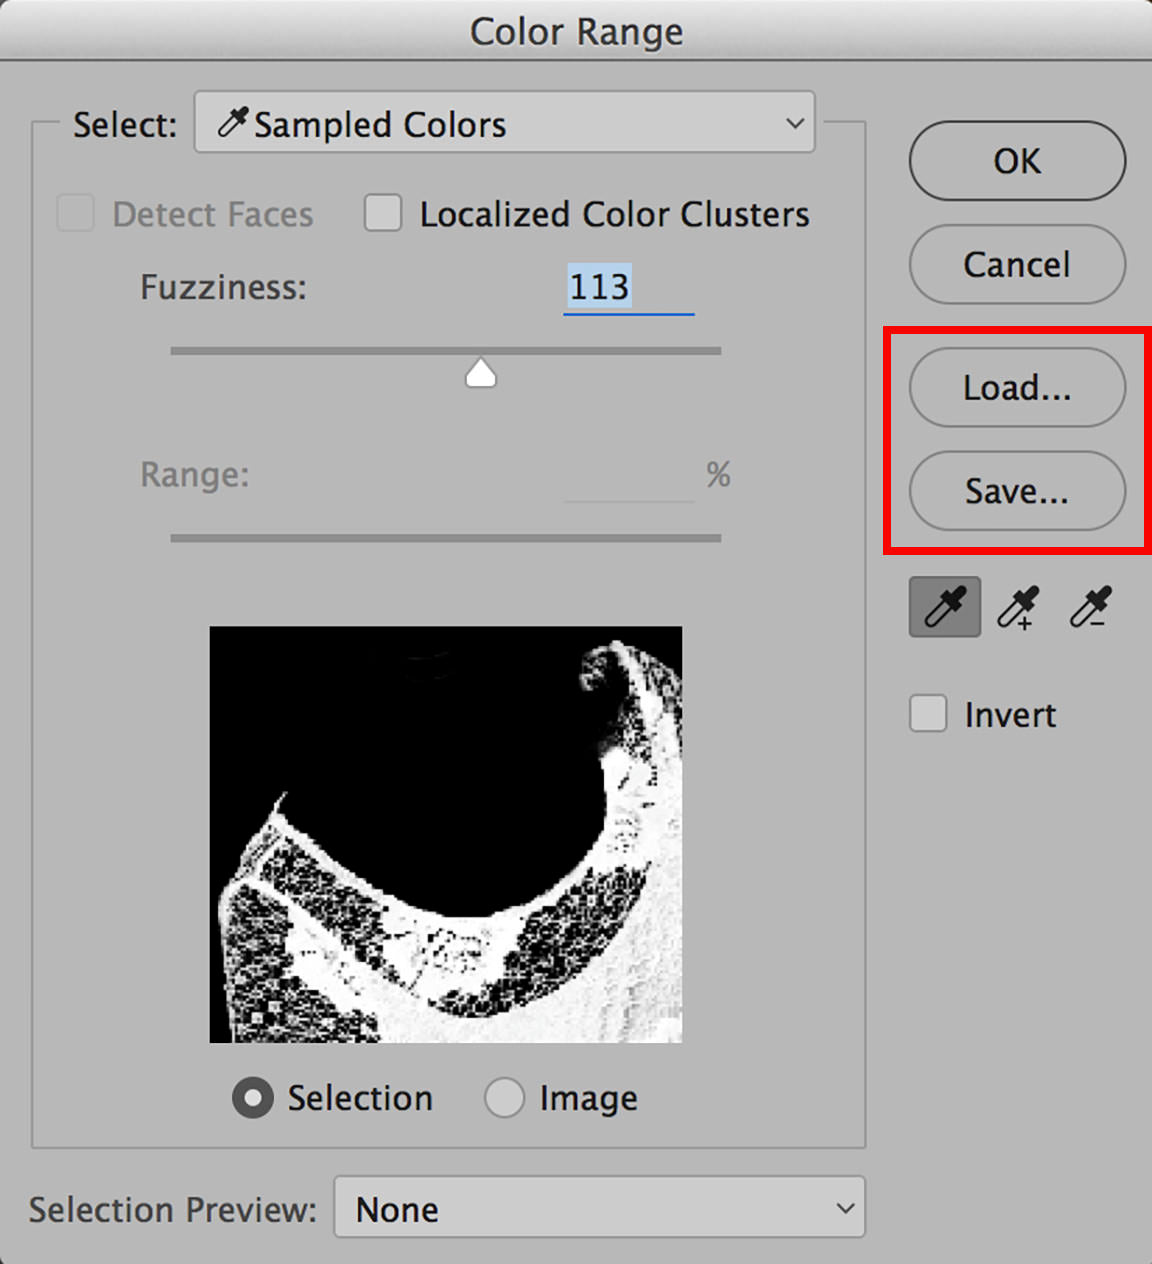
This is advantageous to artists that commonly work with very similar images, such as products for catalogs.
For instance, a picture of a particular Coca-Cola can is likely be used in many different images. The original selection can be saved and reloaded to save time on the future jobs.
Selection And Image Views
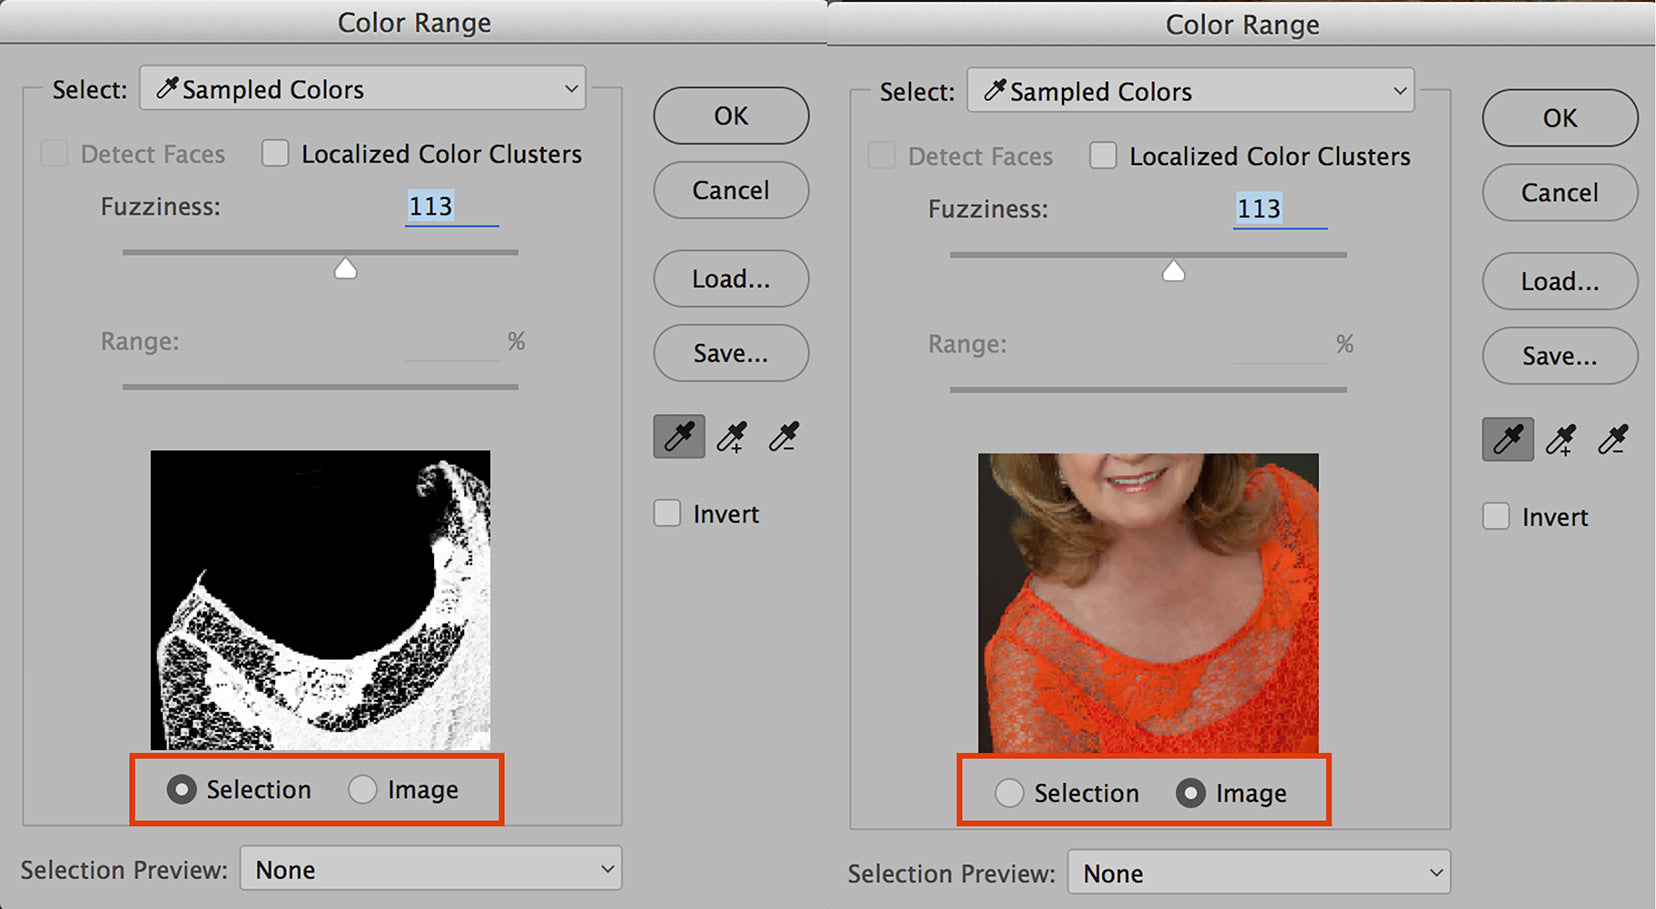
The last option within the Color Range panel is the choice to see either the selection being made or the image.
Initial color selection might be made using Image, but after that, it’s more advantageous to see the Selection.
When making color selections, one can click on the desired color on the image or where that image is represented within the Color Range panel.
Most artists work with both options in order to get a perfect selection.
How To Use The Color Range Tool
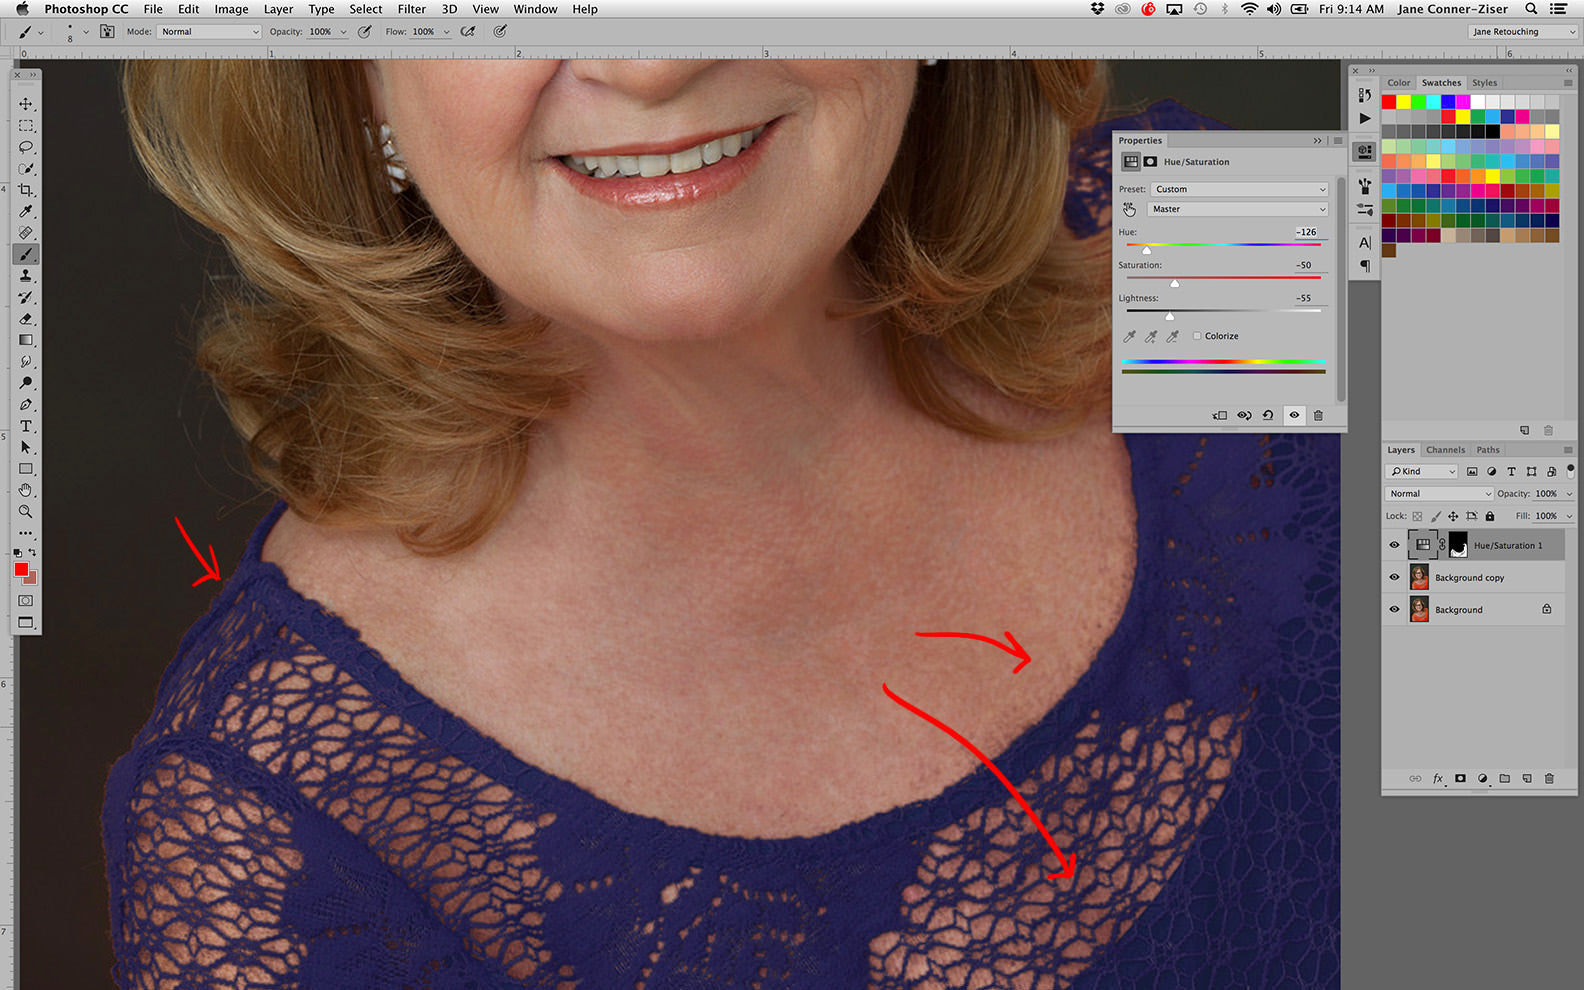
In this example, I’ve selected the orange blouse and changed the color to lavender by using the selection created within Color Range with a Hue Saturation adjustment layer.

Notice that while the selection is very good, there remains slight haloing just at the edge of the clothing.
Because I have the Hue Saturation change on a layer that contains a layer mask, I can expand the selection slightly and then fill it with white at 50% opacity to allow for a softer bleed around the initial selection.
The process is to Command (Control) the mask area on the Hue Saturation Adjustment Layer, choose Select / Modify / Expand, and enter 2-3 pixels.
Edit / Fill with White expands the adjustment that many pixels and Edit / Fade Fill allows you to use the slider to adjust the opacity to taste.

This solved most of the detail challenge in the bleed area but there remains a tiny halo on the top of the shoulder on the right side of the image.
This last bit of targeted refinement work will be accomplished using the Brush Tool with low opacity (20-30%) to paint on the layer mask.
White paint reveals more of the adjustment and Black paint hides any unwanted adjustment color.

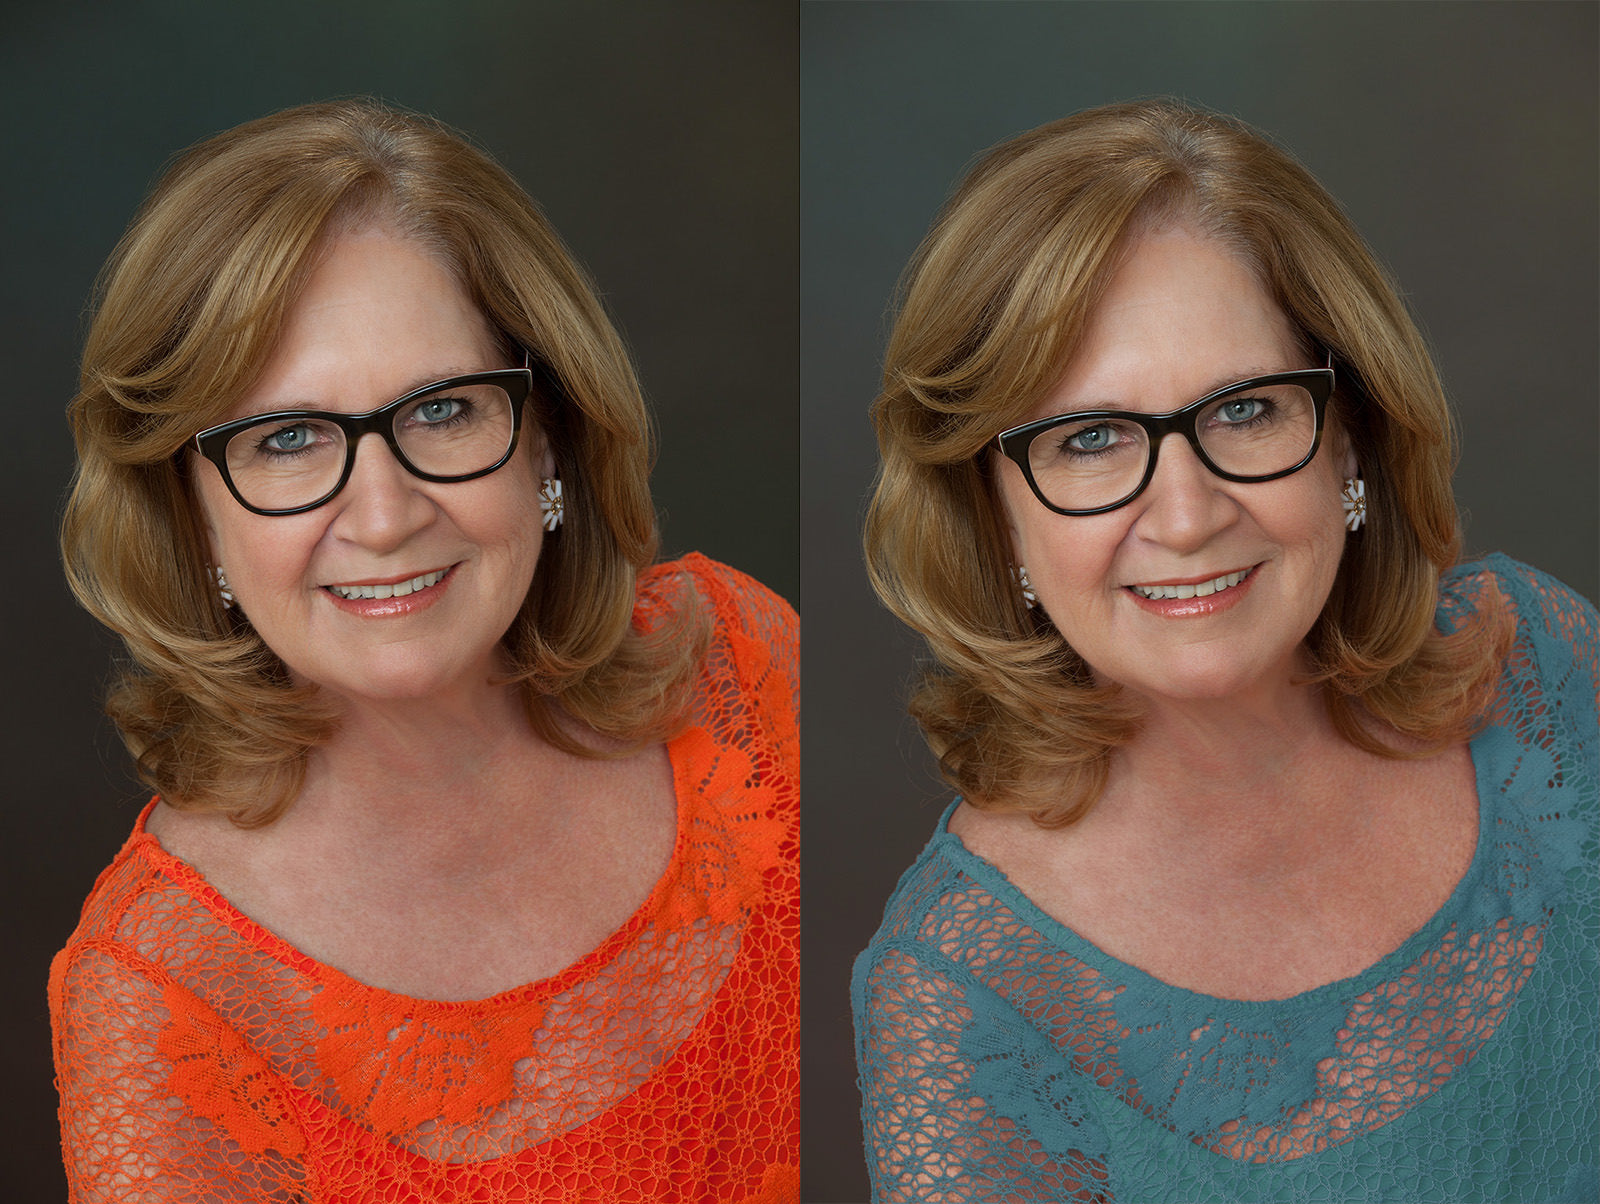
Color Range is the perfect choice when the new color will be close in Value to the original one.
When drastic changes are required, more attention to final details is generally required in order to avoid edge and bleed problems.
In this example you can see speckling on skin tones and edge haloing on the blouse.
These can be removed with additional painting on the mask.
Color Range allowed me to create a very different looking portrait with two easy selections and two adjustment layers.
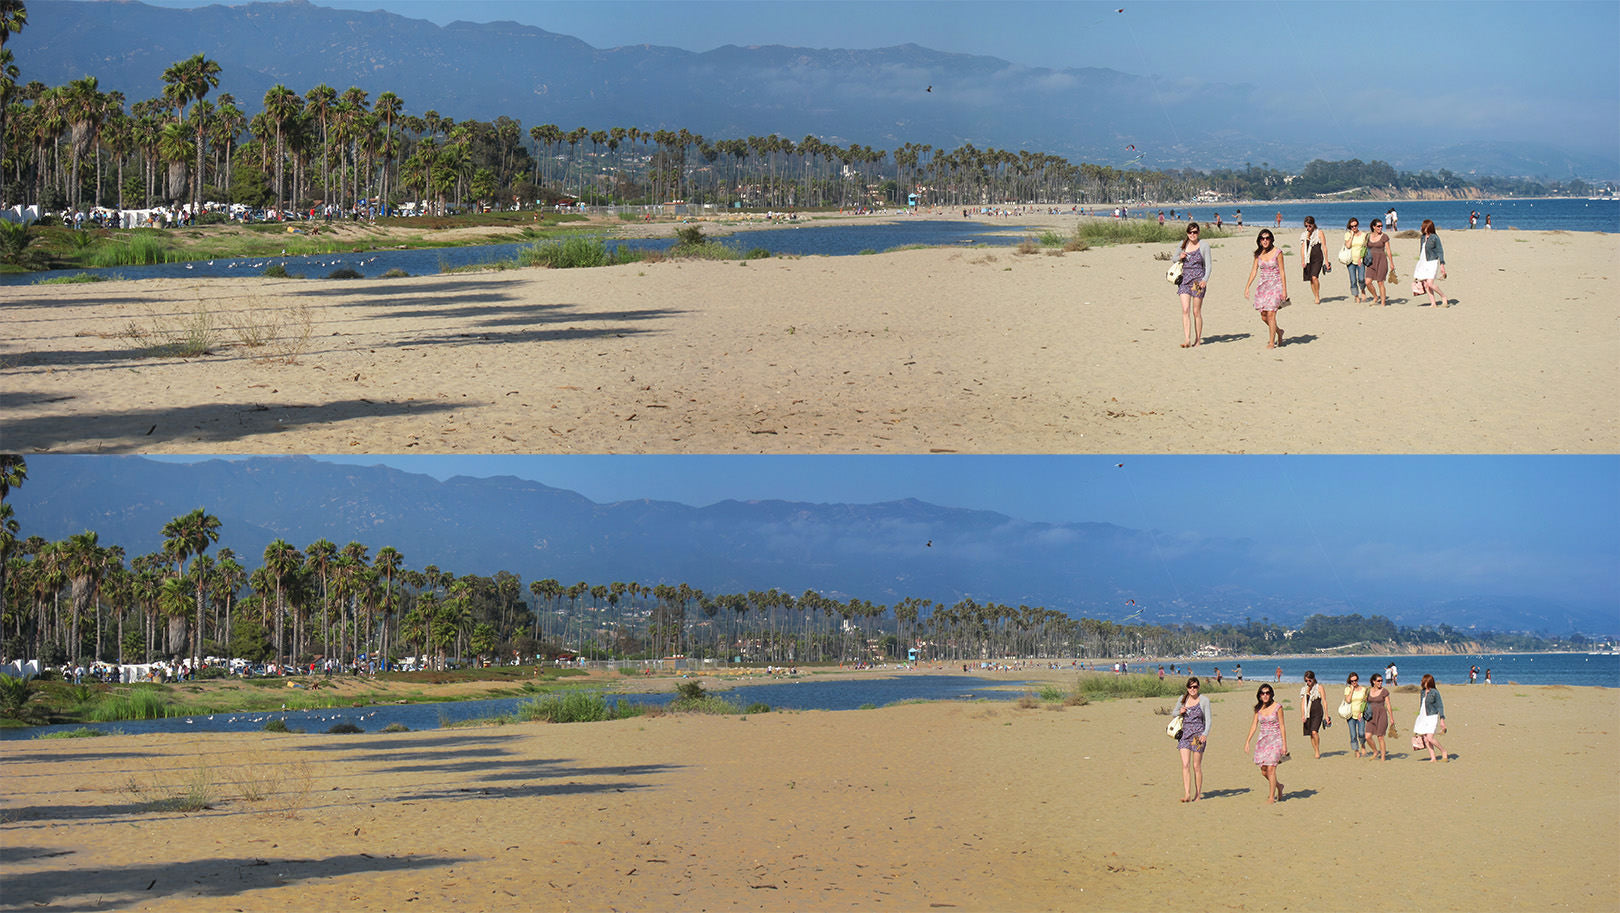
In this example, Color Range was used to adjust the colors of the sky and sand.
Closing Thoughts
Selections created in Color Range can be used to make image adjustments, drop in fill colors, add gradients, hand paint in and create new layers to apply Layer Styles to – whatever you want.
Color Range is a great choice of selection tool when the area you wish to select is distinctively different from the other colors within the image.
Making a quick pre-selection with the Lasso Tool makes it even faster and easier to use Color Range to isolate exactly what you want, without having the fear of including random pixels from other parts of the image file.
Use the options available within the Color Range panel to help you refine the selection as much as possible – prior to accepting it to reduce the amount of hand brush-work required later to achieve a perfect result.
Jane Conner-ziser is an award winning photographer, digital artist, premier educator and independent consultant. With over 25 years of experience, 19 of them in digital imaging and evolving technologies, the techniques Jane developed for facial retouching and enhancement and portrait painting from photographs are widely emulated by photographers and digital artists worldwide through her classes, online training and educational products.
