

How to create a custom Photoshop brush, add it to your pre-set manager, and use it for better control over your brushes for photo retouching and more.
Photoshop contains a great variety of preset brushes that can be used effectively for photo retouching, making custom graphic designs and creating traditional fine arts like drawing and painting.
In addition, many Photoshop users create their own brushes to share or sell online – but hey – why not make your own custom Photoshop brush? It’s easy, fun and rewarding to know that you have the knowledge and ability to customize Photoshop to your own personal tastes and needs, especially when you want something unique.
In this article I will show you how to create a brush stamp, a texture brush and a scatter brush using a graphic, a freehand texture, and a photograph.
More from our Popular Tools in Photoshop series:
Photoshop gives you great clues on how to do this. Choose any brush preset, set the options to 100% opacity and 100% flow, tap it on a layer so you can analyze the footprint and look at its settings in the Brush Presets Window. Then make a few strokes and observe how the brush works on a blank canvas. Here’s a random trio to consider:

On the left are the footprints of what the basic shape of the brush looks like. On the right are sample brush strokes; all are at 100% opacity and 100% flow. As 100% opacity and flow, the brushes don’t paint very effectively; it’s when they are applied in layers at lower opacities that the magic begins to happen:

This means that part of a brush’s effectiveness is discovering how to use it in order to get the effect you want. Experimenting with different opacity and flow settings is one way; another way is to apply each color to a separate layer and explore filters, blending modes, layer opacity settings and hue, saturation and value adjustments.

Let’s get started by making a brush that is intended to be a “stamp”; something an artist might want to do with a signature or a business might do with a logo. We’ll use part of a logo that I created for a yoga institute and my name that was hand written upon a layer:

The important thing about the logo and the signature is that each is isolated on an otherwise transparent background. The logo was created in Photoshop and saved as a PDF in order to preserve the background transparency. The signature was just written upon a New Layer in Photoshop and the background visibility was turned off.
The rest is easy. Open the Layers Window. While holding down the Command (Control on the PC) key, click on the image representation on the layer in order to load the pixels as a selection:

Now choose (1.) Edit / Define Brush Preset. A window will open requesting a name (2.). Upon clicking OK, the new brush will be stored as the last brush in the Brush Preset Window (3.). (I’ve accessed it from the Brush Menu Bar.)

To use the stamp, select the preset, choose options for size and color, create a layer and press down once. Most stamps are applied at 100% opacity and flow but the choice is yours.
Because the stamp is applied to a layer, from this point it can be moved or resized, layer effects may be added, color and opacity can be adjusted, or blending modes can be changed. If Preserve Transparency is checked for the layer, the stamp can be hand painted.


The next brush we’ll make is a hand created texture brush. The process is the same as before, however, the shape will be hand created and additional preset options will be integrated into the expression of the brush.
First a New Layer is created upon which a random texture is painted using any of the existing Brush Presets. Brushes are interpreted by value, so gray to black color is suggested. Black areas will have the ability to paint at 100% of the chosen opacity. Gray areas will express as varying degrees of transparency, depending on the value. Think of white as being 100% invisible and black as being 100% opaque. Here’s a sample of a potential brush preset.

The pattern was drawn on two layers using the default round hard-edged brush (second brush in the preset menu); one layer for the black at 100% opacity and flow and the other layer for the larger shapes at 50% opacity and 100% flow. The gray layer was blurred slightly (Filter / Blur / Gaussian Blur) and then the two layers were selected together (Select one and Command or Control click on the other) and merged. (Layer / Merge Layers)
As before the next step is to load the layer as a selection and choose Edit / Define Brush Preset. I name this initial capture “test brush” because this is basically a new brush tip shape and from this point there are a variety of options available in the Brush Window that affect the expression of the new brush. Let’s explore some of them.

The first control is located in Brush Tip Shape, under the stroke icons. There are options for size, flipping the shape horizontally or vertically, angle, roundness and spacing. Note the default settings (jot them down on a notepad) and experiment with them, making strokes upon New Layers until you believe the general appearance of the stroke is the nicest you can get.

Next click on the words Shape Dynamics. When this option is selected by clicking on the words a check will appear next to the words Shape Dynamics and a menu will become visible that allows adjustments for things like size according to pen pressure, stroke fading, and randomness (jitter) for angles and roundness. Once again, note the defaults and experiment with the options until you are pleased. (I used size with pen pressure option, changed the minimum size of the brush to 40% and added a roundness jitter of 40 with minimum roundness at 20.

Notice how the selections changed the way the stroke appears. Choose a medium value color and various opacities to experiment, make strokes and analyze the other options in the Brush Window until you are pleased with the new brush preset.
It is possible to go back and change the options you started out with at any time. Briefly, this is what the other options provide:
Note:If a menu does not open when the option word is clicked upon, it means that no adjustments are available for that option; it’s either on or off.
- Scattering – copies the brush tip shape and scatters it in a spray pattern with adjustment options for the number of pieces scattered and control of them through fading, pen pressure, direction (of stroke), pen tilt, stylus wheel (only on the “airbrush” stylus) or rotation.
- Texture – allows the new brush to behave as if it is being applied upon a textured paper plus allows for changes of texture size, etc. There is also an option to blend the tip or entire stroke using a blending mode.
- Dual Brush – allows you to combine two brushes into one just by choosing one of the other brush tips within the menu and making adjustments for size, spacing etc. There are also blending mode options for how the brushes relate to each other.
- Color Dynamics – allow variances within a stroke of value, hue, saturation, brightness and purity of each. Generally subtle variations here are more effective than bold differences.
- Transfer – affects the appearance of how the brush stroke changes during the application, like fading a bit at the tip etc.
- Brush Pose – allows the user to override the stylus options and apply the stroke as if one was using a mouse.
- Noise – applies grain to the brush.
- Wet Edges – makes the strokes darker at the edges.
- Build Up – allows the color to continue to build opacity during an application.
- Smoothing – generally for mouse users. Enables the stroke to look smoother during applications.
- Protect Texture – applies the same texture to all brush presets that have an option for texture. This is helpful if several brushes will be used on a painting but the artist wants to maintain a uniform canvas texture.
This is what my brush stroke looks like after making adjustments in the noted options within the Brush Window. I tested the application using three or four colors at 20% opacity and 100% flow.

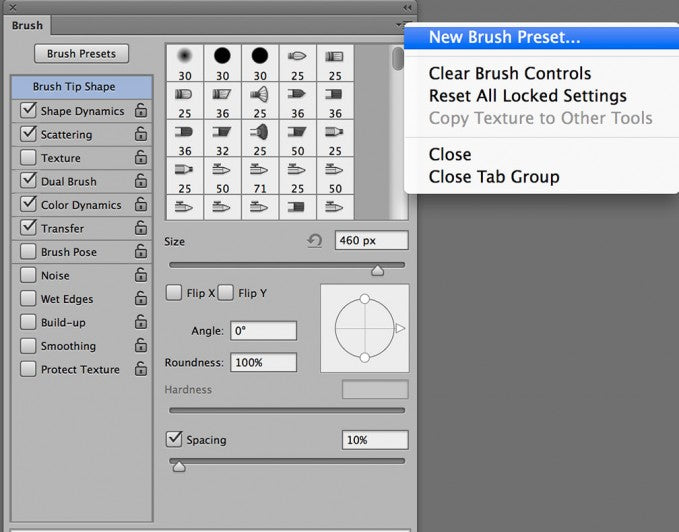
Once you are satisfied with the brush it can be saved as a New Preset with all of the customizations in place.
Note: This same process may be used to capture a piece of texture and use it as a brush. Just use the Lasso Tool to select a sample of the texture, copy and paste it to a New Layer (Layer / New / Layer Via Copy), desaturate and adjust the contrast and value to make a crisp black and white representation of the texture and then proceed as before.

So far we’ve covered making a custom Photoshop brush stamp from a signature or logo and two options for making a custom texture brush “from scratch”. The last brush for this article is how to make a scatter brush from part of a photographic image – a nice way to sprinkle snowflakes, flowers or other decorative touches randomly upon your image files.
Choose an image that has good clarity. Select the part of the image you want to make into a scatter brush, copy and paste it to a New Layer and turn it to black and white with good contrast. Remember that black will produce 100% of the chosen opacity and white will be completely transparent. Gray will be semi transparent. Follow the previous steps to create the initial brush footprint (Command (Control) click the layer to load the black and white image as a selection and Choose Edit / Define Brush).

Make large adjustments for size, angle and direction jitter in the Brush Window for both Shape Dynamics and Scattering, noting the changes created in the stroke preview at the bottom of the Brush Window. Make practice strokes on a New Layer until the brush is behaving the way you like.
HINT:Most scatter brushes work best when applied with short abrupt flicks of the stylus. Apply the flicks to multiple New Layers so the shapes can be moved around or transformed to perfection and unwanted extras can be erased.
Photoshop brush menus can look daunting, but I hope that this article takes some of the mystery away and empowers you to explore and experiment – and have fun creating new and unique brushes to enhance your imaging arts. Feel free to make mistakes because Photoshop offers the ability to delete unwanted brushes – just access the Preset Manager from the fly out menu in the Brush Preset Window.


Here you can delete unwanted brushes, drag and drop the ones you use most to the top or rename brushes. If you create a set that you like, you can save the set (I put mine in a folder on my hard drive especially made for my custom collections of brushes, papers etc). Note that in the fly out menu in the Brush Preset Window that there is also an option to Reset (the default) Brushes, Load Brushes or Replace Brushes – as long as you save your brush sets, nothing will be lost.
Understanding the depths of what Photoshop can do provides powerful creative freedom for photo editing and retouching. Knowledgeable choices for how to do things improve work efficiency and quality so education is important! Take control of your Photoshop to enjoy limitless retouching and creative possibilities!

Jane Conner-ziser is an award winning photographer, digital artist, premier educator and independent consultant. With over 25 years of experience, 19 of them in digital imaging and evolving technologies, the techniques Jane developed for facial retouching and enhancement and portrait painting from photographs are widely emulated by photographers and digital artists worldwide through her classes, online training and educational products.
