

Our comprehensive guide to tripods – how to choose a tripod that matches your needs as a photographer, what makes a good tripod, factors to consider when buying a tripod, and more.
tripod for photographyIt’s happened to all of us. We capture a “perfect image”, have visions of it adorning our walls and selling multiple copies, but when we see it enlarged on screen or in a big print, it’s not sharp, and our dreams are dashed.
This blog post surveys the many decisions required to buy the best tripod for our needs, and illustrates some of the choices you can make when choosing one tripod over another.
Why use a tripod, anyway?


The value of sharpness

An image that evokes the reaction “Oh, how sad the photographer couldn’t have captured that image just a bit sharper” distracts the viewer from enjoying the image into contemplation of poor technique. It’s the same effect with images that are overly sharpened in the computer.
A tripod is a key component for getting sharp images at all times.
Whether shooting in low light, shooting with slow shutter speeds, with a heavy lens and camera combination or whenever the sharpest print possible is desired. A word of caution: good tripods cost money. It can actually be better to handhold a camera than rely on a low-quality tripod. And, if you don’t use a cable release, you’ll add vibration when using a tripod, not reduce it. For more on getting sharp images every time, I also wrote this informative blog post.
The choices can be overwhelming; there are hundreds of different models of tripods, tripod heads and accessories. Here’s a comprehensive list of choices to help you make the best choice. The first factors to evaluate are maximum height needed, minimum height and center column (or not?).
Tripod Height
How tall do you need your tripod to be able to get?

tall tripodAn average contemporary tripod’s three legs extend 50–63 inches (126–160cm) from the ground. Shorter and taller tripods are available, but this is the standard range.
If the tripod has a center post that allows repositioning of the camera higher, this height may allow you to shoot from eye level. The head you choose to put on the tripod adds to total height, and should be factored in.
While it’s undesirable to shoot from eye level all the time, it’s good to be able to do so, and hard on the back and neck if your tripod is so short you have to stoop to look through it all the time. A further consideration is that using a tripod with legs and center column fully extended often reduce sharpness. Buying a tripod that’s taller than you’ll normally use can help you capture sharper images.
My latest tripod is 69 inches high at full height. My eyes are 66 inches from the ground. When I set up my tripod and add the tripod head onto it, it adds 4 inches. The camera with L-bracket adds another 4 inches, so that my eyes can’t look directly into the viewfinder if the legs are fully extended. For normal use I put the tripod at eye level, lowest legs only partially extended. I use the tripod without extending the bottom legs at all when sharpness is a critical factor.
It would be nice if my tripod were tall enough that I could avoid extending the bottom leg entirely and still look through the viewfinder while standing up straight, but the extra weight of a tripod that tall is over my baggage weight limit when flying.
Previous tripods I owned were shorter, and I’d often need to extend the center post in order to be able to look through the viewfinder. Given a choice between a fully extended tripod, or raising the center post of the tripod, I’ll usually choose to extend the legs, saving the center post for absolute need.
An advantage to having a taller tripod is that when I need to shoot on uneven surfaces, I can extend one leg further to balance, for example shooting on a hill side. It’s also helpful shooting over crowds.
How short do you need your tripod to be able to get?

Tripods are most stable with the least leg extension, so some manufacturers offer shorter tripods than the average.
If you need to get very low to the ground, some full size tripods let you extend the angles of the legs out so wide the center of the tripod is as few as 4 inches above the ground.
Other models, with center columns allow removing the center column, then reinserting it upside down so that the camera can be lowered all the way down to the ground. For getting certain angles for certain shots, this capability is essential, so if you need it, be sure you choose one of these two options in the tripod you choose.
For traveling, consider how long the tripod will when it’s completely folded up for travel. Do you need it to fit in a carry-on bag or strapped to a camera bag? Do you need it to fit in a suitcase, whether diagonally or parallel to the sides? Make some measurements and add this to your list of considerations if needed.
Center Columns
People who’ve tested tripods extensively assert that tripods without center columns deliver sharper results, even when the center column is not at all extended.
They state the extra rigidity leads to extra sharpness. Contemporary tripods, with adequate leg thickness and improved rigidity will have less of an issue than older models. I continue to buy and use tripods with center columns, confident I can minimize the risk of vibration, because there are times when I need the extra height the center column offers. I could also purchase a modular design, with a standard center plate, and an option to remove the center plate and put in a center column if needed.
In the closeup of the tripod’s spider, shown above, there is a hook prominently seen. This sturdy hook is used to hang a sandbag or a camera bag for added stability. The weight pulls all three legs down evenly.
One of the first combat photographers I ever met depended on this hook to stabilize a much lighter tripod than you’d expect him to carry, allowing him to capture great images, very sharp, under far-from-ideal conditions by hanging his camera bag from the hook in the field. This hook is essential for me on any tripod I buy. It’s available at the end of some but not all center columns if you choose a tripod with a column, so be sure the one you choose has the hook.
If you need to get close to the ground, you may find you require the center column to be removable. This can be inserted upside down to hold the camera a couple inches above ground, getting the camera very, very low to the ground.
What about a pivoting center column?
A further consideration for a center column is the option to have a center column that pivots, so that it can be extended out at a perfect right angle or other angles as needed. These designs let you put the arm anyway you want it, including very close to the ground. I prefer a separate cross arm for stability, which attaches to the top of my tripod.
Tripod Legs
More legs = more stability?
In past years, maximum stability was achieved by three longer legs, as opposed to four shorter legs.
Research to even out this disparity has continued, and some high-end tripod manufacturers state that their latest models seem to show no practical difference in achievable sharpness between same height models with three and four sections.
Tripod legs with four sections collapse down to be shorter than three-section legs of equal height, so tripods with four-section legs are popular when traveling. There are also some five section tripods; the jury is still out on their stability.
What kind of legs are available?

The image above shows four different standard types of tripod legs.
Wood was the earliest tripod material; aluminum came along and changed how many tripods were made. While both materials are still used, current trends show a strong preference toward lighter, strong metal alloys and to carbon fiber legs. These are lighter, and when properly made, transmit less vibration than some earlier tripods.
Which should you buy?
It’s possible to buy old tripods that are still in good shape, many of them very sturdy, and very heavy.
A recent studio sale I attended offered three 40 year old tripods with legs and heads designed for 8×10 view cameras. These were available for next to nothing, but found no takers; they weigh a ton. Weight is a serious consideration when you are traveling with a tripod, whether shipping it in luggage or carrying it around once you get to your destinations, so heads made of cast iron and legs made of steel may be best reserved for your studio unless you never shoot more than 20 feet from your car trunk.
Wood legs may help you get your inner Ansel Adams on, but Ansel had mules to carry his heavy equipment, or station wagons (more than one of his most famous images were shot from the roof of his car.) Wood can minimize vibrations well, and often weighs less than sturdy steel legs. Aluminum was the perfect go-to material for best support to weight ratio for many years, and is still widely available, less expensive than popular but pricey carbon fiber or exotic alloys.
My best advice is to choose the most cost effective options for the work or works you do.
For example, I have a well-made sturdy tripod, with aluminum legs and crossbraces. It has metal leg clasps, and I use it with a geared, micro-adjustable head. I use it for macro work and other images I plan to enlarge to great size. It’s incredibly sturdy, has a big footprint, is taller than I need for most work and weighs more than I’d ever like to haul around. I picked it up for next to nothing at a studio sale, knowing I’d reserve it for work which didn’t require lugging it long distances, happy to have the stability and the height I’d need for a small but important number of jobs to shoot.
For travel, on-location shooting and portability, I purchased a carbon fiber tripod to replace a set of carbon legs recently stolen. I considered carefully my need for supporting heavy lenses against the maximum weight I could pack in my suitcases for flying to locations, measuring the interior of my suitcase and the length of the folded tripod, and chose the best balance between length, weight, and cost. Even lighter tripods are available for more money. More details about the decision-making process are coming up.
Leg angles: how low can you go?

If you need your camera to shoot very low to the ground, check for minimum heights as well as maximum heights.
Some tripods allow you to extend each leg so far out that it’s almost parallel with the game. As noted already, some tripods don’t go too low to the ground, but offer an option to reverse the center column and hang the camera very close to the ground.
Legs have feet; what kind should yours have?
Tripod legs are tipped with various options.
Most common is a rubber tip, which serves to protect the floors and dampen floor-transmitted vibration. Some tripods have a combination of a rubber tip, with a hole in the center. Rotating the tip one direction reveals a spike, used to plant tripod legs more firmly in soil when working outside. Rotating the tip the other way hides the spike, preferred when working on hardwood floors and other easily scratched surfaces.
Other tripods come with interchangeable tips, one set of rubber tips and a set of spikes. Spikes can be useful shooting in windy environments, securing your tripod for landscapes.
Stability
A flimsy tripod is a bad choice.
Plastic tripods are available, and tempting because of their light weight and low price, but are not serious choices due to the vibrations that most plastic tripods transmit.
How do you know if a tripod is stable and doesn’t transmit vibration?

One of the practical tests you can do, assuming you can test before you buy, would be to set up your tripod on a surface that’s affected by vibration, such as at the side of a busy roadway, or on sidewalk over a subway tunnel. Then, put your finger on the camera body or lens, checking to see if the vibration you feel in your feet is transmitted to your finger.
Load Rating: Not always what it seems
Specifications for tripods usually list the amount of weight a tripod can support.
You’d think that you’d simply add up the weight of the gear you plan to support on the tripod, match the weight against the specification and you’d be done. That is a good start.
However…
Rated weight has to be considered against stability.
Most sets of camera/lens/filters/accessories won’t weigh more than the rated weight of tripods, and will not cause the tripod to collapse, even when the rated weight is exceeded.
The question is not so much one of holding up the weight but is about avoiding transmitting vibration through the legs to the camera, thus degrading sharpness. As you’d suspect, the bigger a tripod’s rated weight, the bigger the legs. For a long time, photographers would purchase bigger than rated legs for increased stability, willing to pay the weight and cost penalty.
Recent advances in higher-end tripods have caused some tripod manufacturers to state their tests show that a rated weight is not always the best indicator of stability, using advanced composite legs to further dampen vibration. When possible, it’s a great idea to check the manufacturers’ websites for information on stability before purchasing; the best tripod companies will have a lot of info about the quality of their support and how they manage vibration. If you don’t see information on this topic, further research is needed.
OFF WITH ITS HEAD
Tripod headSome tripods come with heads permanently attached. Usually, these should be avoided.
Buying a tripod that doesn’t have an attached head allows you to pick the head or heads you need for your work.

For example, I have a micro-geared head to use for precision work, a 5 axis head for general shooting, and a panoramic head for shooting 360° panoramas. A 600mm lens is best used with a gimbal head. Separate heads and tripods are best for almost everyone.
OTHER ACCESSORIES & FACTORS TO CONSIDER
I often carry my tripod in a suitcase, and every ounce is critical.
This means the heavyweight bag that came with the tripod is discarded in favor of a clear plastic bag, which will protect my clothes and not tear when my luggage is tossed about in transit.
In my experience, tripods with flip levers can easily tear the flimsy trash bag, and damage suitcase contents—another reason to avoid them. Some tripods come with hooks built in to attach a strap. Do you need a strap? Depends on how you like to carry your tripod.
If you carry your tripod strapped to your camera bag, another strap for carrying your tripod over your shoulders is superfluous.
Leg Locks

Leg locks hold the tripod’s legs firmly at the correct extension. These fall into two types; rings around the legs, or flip levers. While some argue for flip levers, my experience with them has been less than positive. They require ongoing tightening, as they loosen over time.
The hardware catches on other things as it sticks out from the legs, and it takes me longer to open and close the tripod. I prefer rings, and specifically, ring locks that are ergonomically designed so that I can loosen or tighten all three at a time. Sometimes the seconds saved are critical for capturing the shot I want, or putting the tripod away.
Weight and Bulkiness Tradeoffs
Your tripod does you no good if it isn’t there when you need it.
When it’s too heavy or bulky, it’s a constant temptation to leave it behind. We’ve progressed over time from tripod behemoths made of wood and iron, needing a mule to carry. Now, we have aluminum, titanium, magnesium, and various composite materials which are significantly lighter than most tripods used to be. Wood tripods are still available too, if you want to build strong bodies twelve ways carrying them around, as well as older models made of heavier metals.
Many of these new, lightweight materials are significantly more expensive than the older materials. The larger the tripod, the more advantage the lighter materials bring. If you’re buying a smaller tripod, the weight savings gained by buying the lighter weight tripod may not justify the expense.
Bigger Is Not Always Better
When you’re looking for tripods, consider the amount of space the tripod will take up (important in suitcases). If the tripod is carried outside the studio for use on the road, both weight and bulkiness should be minimized. I debated carefully between two models recently. The first model weighs 4.74 lb (2.15 kg), and when folded, is 23.2” (59.0 cm). It would fit nicely along one side in my suitcase, and can support 44.1 lb (20 kg).
The next model up is rated for heavier loads at 55.1 lb (25 kg), but weighs 5.84 lb (2.65 kg), with a folded length of 25 in (63.5 cm), which will have to travel diagonally in my suitcase. Will I regret that extra pound of weight when carrying it around? Sometimes, sure. Other times, I’ll be delighted the 150-600mm zoom has adequate support. As you can see, balancing priorities requires some careful thought, and multiple if-then scenario considerations.
Carrying the Tripod

The best tripod is one you have with you, so how you will carry it is a critical concern.
My latest tripod can either be strapped to my camera backpack, or it can hang over my shoulder using the included strap. Regrettably, my previous tripod’s strap connectors were made of pig metal, and broke off very quickly. I made a replacement strap attached with Velcro™, but it was annoying that such an expensive tripod had such a cheaply made part to break so easily. As noted earlier, some tripods come with carrying cases, nice when weight isn’t a consideration, but also another thing to risk losing.
Waterproof and Weatherproof Tripods
Certain types of shooting require tripods that work in wet weather. If your work requires putting your tripod in running streams or the ocean, for example, you’ll want to check out models designed specifically for this purpose.
When You Can’t Use A Full-Sized Tripod

There are places and times you won’t be allowed to use a tripod. Most museums, for example, never allow the general public to set up tripods.
For a long time, I’ve carried a Leitz tabletop tripod and large ballhead, as shown in the photo above. It fits in a pocket, or a camera bag. It can be braced against a wall (unwise in museums), used on tabletops, benches, or floors, and (my favorite), braced on my chest. Long before digital, I was able to use fairly slow-speed film to photograph in museums around the world with great results and no interference from museum staff, bracing my camera against my chest.
Some people will prefer the small ballhead which is two inches shorter; it all depends on where your neck/chest/eye level intersect with your camera viewfinder.
While the combination of higher-sensitivity cameras delivering great quality and lenses with vibration reduction have reduced the need for tripods in some settings, there are still many times when I pull this out and put it to effective use. Using this combination can let you shoot up to 4 shutter speeds lower, or lower your ISO for better quality and still get the shot.
As with all Leitz products, the quality is reflected in the price—but it’s so well made that I’ve had mine for 45 years. it’s worth the investment, because the products’ sturdy construction means you can support a full weight DSLR and a fairly big lens (up to 15.4 lbs rated capacity, 5.3” or 3.3” height.)
A quick check of options for similiarly-sized tripods showed over 300 other choices available on one photo website. Many of them are designed for very lightweight cameras, so choose according to the weight rating of the camera and lens you’d want to use.

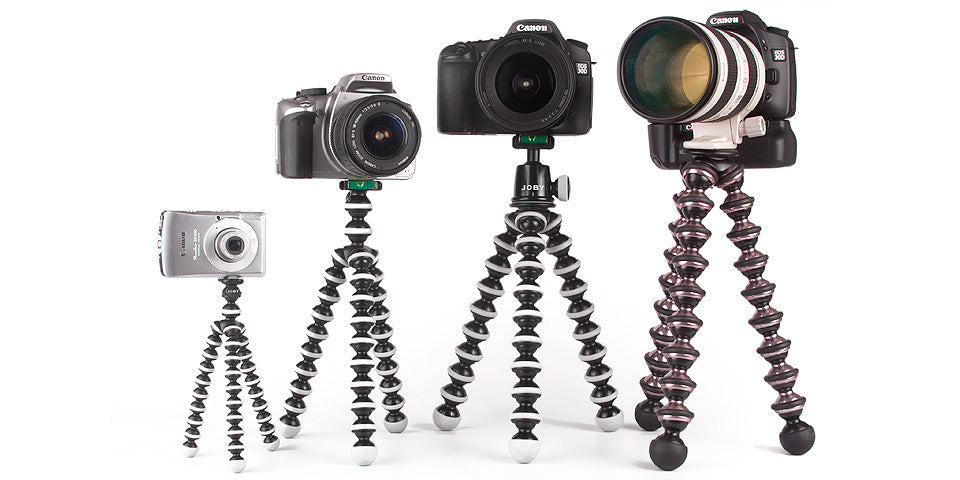
Other specialized products designed to support your camera where you can’t use a full tripod include clamps which hold your camera, or the Joby GorillaPod Action Tripod, shown at right, whose legs can be wrapped around trees or poles as well as bent to custom shapes. I use my GorillaPod often, and highly recommend it. Similar options exist from other manufacturers with clamps to attach your camera to irregular surfaces. It’s all a question of finding the right tool to match the job at hand.
WRAPPING IT UP – PICKING THE BEST SUPPORT FOR YOUR NEEDS

Choosing the right tripod requires serious thought and careful research.
The thought requires identifying your particular shooting styles’ requirements, and the research will identify the best match between your requirements and the wide range of options.
Don’t skimp on this purchase; it’s essential to have adequate support.
On the other hand, once you’ve identified the best match to your needs, eBay and Craigslist can be your best friends.
Here’s to good support, and sharp image capture.

Kevin O’Connor helps design and test software, is a graphic designer and photographer for multiple clients and companies, and fixes people’s (and companies’) color.
He has consulted to multiple companies, including Apple, Sony, Fujifilm USA, and X-Rite. He loves teaching good color practices to enthusiastic learners.
Have a Printmaking Question For Kevin?
Get Your Question Featured
on the #AskBC Podcast
We are going to feature Kevin on an upcoming episode of the podcast and would love to have him answer your printmaking questions.
If you have a question for Kevin just click the button below and leave a question.
